To modify the displayed borders of any workplane that are not attached to 2D constructions, you can use the command "PZ: Set Paper Size":
Icon |
Ribbon |
|---|---|
|
Workplane → Modes → Page size |
Keyboard |
Textual Menu |
<PZ > |
Customize > Page Size |
Modifying the displayed borders of a workplane changes the size of the 2D page created for this workplane.
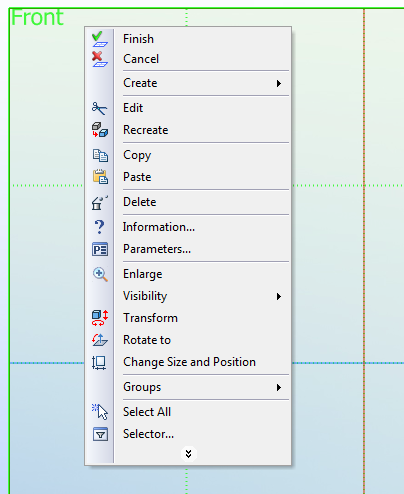
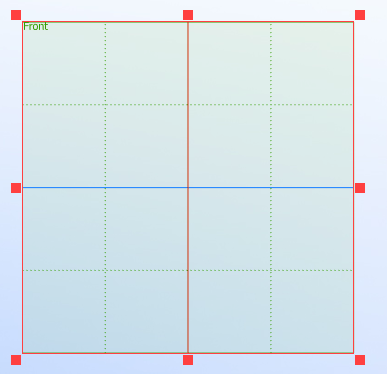
The command is accessible only when the page is active in the 2D window, whose size needs to be changed, or when the workplane is activated. There is yet another way of calling this command. Move the pointer to the workplane and right click ![]() . This can be done either in the 3D window or in the 2D window. In the coming up context menu, select the item "Change Size and Position". (This item does not appear in the context menu for workplanes created from existing 2D pages filled with constructions.) As result of the described actions, the workplane and its respective page are displayed as shown:
. This can be done either in the 3D window or in the 2D window. In the coming up context menu, select the item "Change Size and Position". (This item does not appear in the context menu for workplanes created from existing 2D pages filled with constructions.) As result of the described actions, the workplane and its respective page are displayed as shown:

To modify the size of the workplane, move the pointer to one of the square handles on the workplane border. The pointer will change the appearance, reflecting the current resizing action. Depress ![]() and move the mouse in the desired direction. The exact values can be entered in the command parameters. To move the workplane, point the mouse within the border of the workplane. As the pointer changes appropriately, depress
and move the mouse in the desired direction. The exact values can be entered in the command parameters. To move the workplane, point the mouse within the border of the workplane. As the pointer changes appropriately, depress ![]() and move the workplane to the desired position. The new size and position of the workplane is confirmed by
and move the workplane to the desired position. The new size and position of the workplane is confirmed by ![]() .
.
