Libraries |
  
|
Libraries |
|
When working with assemblies, standard elements are often used as fragments or pictures. Libraries provide an orderly way of managing sets of standard element files.
A T-FLEX CAD library keeps the path to the folder with the standard element files. When selecting a file, a document preview and document properties preview are available in a separate window.
Sometimes, simultaneous access to several libraries is needed. T-FLEX CAD allows composing library configurations. Each configuration can include an unlimited number of libraries groups, each group containing a set of libraries.
Library Configurations and Library Explorer
A library configuration is a convenient means of managing numerous documents and libraries of parametric elements that can be used as fragments.
Library configurations are stored in “.tws” files. A library configuration can consist of libraries or groups of libraries. Groups can include other groups or libraries. Therefore, library configurations can be structured hierarchically. A library contains data about paths to a folder on the disk, containing the document files. Therefore, for documents files to be included in the library simply place the files in the appropriate folder on the disk.
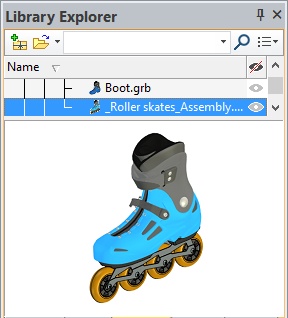
The actual management of libraries and included there document files is done via the library explorer.
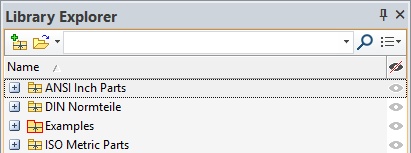
The library explorer is a window displaying the open library configurations with all its files. The user has access to files for opening and for inserting fragments and pictures in the commands FR: Create Fragment, IP: Insert Picture, 3F: Insert 3D Fragment, 3MO: Insert External Model.
Icons of library explorer elements:
|
|
|
|
|
|
Icon created in command IC: Create/Edit icon is displayed for files.
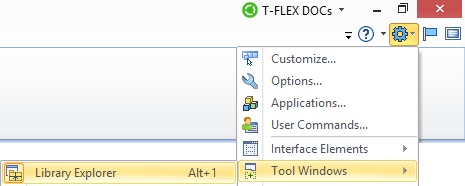
Library explorer window can be activated via ![]() > Tool Windows > Library explorer.
> Tool Windows > Library explorer.
Toolbar Options
There is a special toolbar for Library explorer window.
![]()
The toolbar allows to:
1.Create a new configuration ![]() .
.
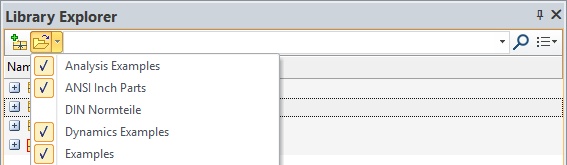
2.Open a configuration ![]() .
.
Drop-down list of all installed library configurations appears after pressing down arrow next to Open Configuration command icon ![]() . It is helpful for opening and closing existing library configurations.
. It is helpful for opening and closing existing library configurations.
3.Use search bar ![]() .
.
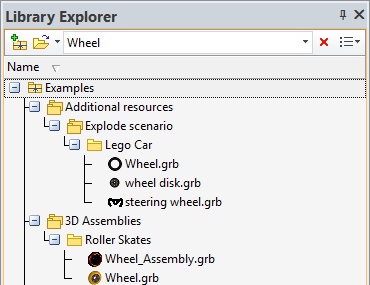
When you start search, all documents, which names satisfy the search request are shown in the Library Explorer.
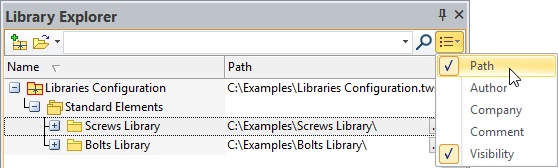
4.Show/hide elements information columns ![]() .
.
Columns contain information about library explorer elements. The information can be edited. Records can be sorted by columns.
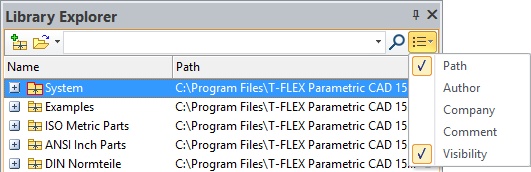
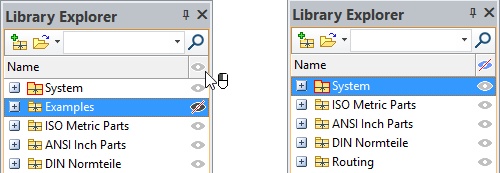
“Visibility” column allows to hide configurations, libraries and files in the window. You need to click ![]() icon next to the element for this purpose. You may control visibility of the hidden elements by clicking icon in the column header.
icon next to the element for this purpose. You may control visibility of the hidden elements by clicking icon in the column header.
“Path” column displays path to the library and allows to change it manually. There is an option ![]() in the column, which allows to select a new directory for the library.
in the column, which allows to select a new directory for the library.
![]()
You can insert information for configurations, libraries and libraries groups in “Author”, “Company” and “Comment” columns. The information will be stored in a configuration file.
Context Menu Commands
Library configurations are filled via the library explorer. The library explorer commands are called by mouse right-clicking in the “Library explorer” window. The menu of the currently available commands pops up on the screen. The context menu contents depend on where the mouse cursor is pointing to at the moment (the window title, the name of a library configuration, a group name, a library name, filename, etc.).
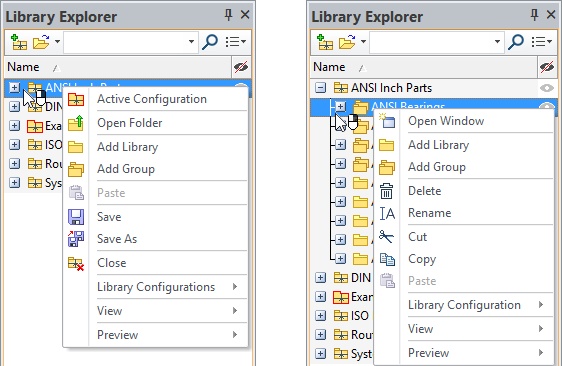
Common Commands of Context Menu
Context menu commands that can be used for different type of library explorer elements are described in the section.
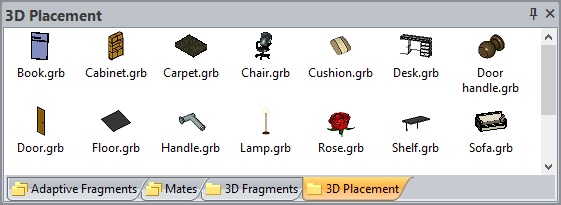
Open Window. Opens a separate library window. This command is available in the context menu of libraries and libraries groups. You can also simply drag and drop the icon of the desired library from the library explorer into the document window.
Individual windows can be opened for several libraries. Like any service windows, windows with libraries can be combined into a common window with tabs.
Add Library ![]() /Add group
/Add group ![]() . Allows to add a new library/libraries group. The commands are available in the context menu of configurations or libraries groups.
. Allows to add a new library/libraries group. The commands are available in the context menu of configurations or libraries groups.
Open Folder ![]() . The command is available in context menu of configurations, libraries and files. A Windows folder with the selected configuration, library or document will be opened after the command activation.
. The command is available in context menu of configurations, libraries and files. A Windows folder with the selected configuration, library or document will be opened after the command activation.
Delete ![]() . The command deletes groups, libraries or library elements.
. The command deletes groups, libraries or library elements.
If you delete a group, all libraries and groups included in it will not be deleted from the configuration.
If you delete a library, its folder will not be deleted from the disk.
If you delete a file, it will be deleted from the library explorer and from the disk.
Rename ![]() . Use this command to rename library, group of libraries or file.
. Use this command to rename library, group of libraries or file.
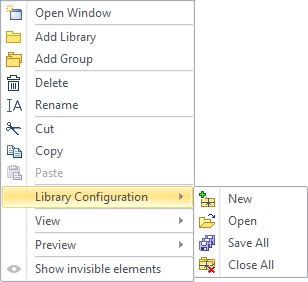
Library Configuration. Set of commands that allow to work with libraries configurations.
![]() New. Creates a new library configuration. The command brings up a dialog box for inputting the name of the newly created configuration file and defining saving location on the disk.
New. Creates a new library configuration. The command brings up a dialog box for inputting the name of the newly created configuration file and defining saving location on the disk.
![]() Open. Opens the library configuration file. Several configurations can be opened in the Library explorer window.
Open. Opens the library configuration file. Several configurations can be opened in the Library explorer window.
![]() Save All. Saves all open library configurations.
Save All. Saves all open library configurations.
![]() Close All. Closes all open library configurations. If changes were made to some library configuration, a query about saving changes will be made before closing.
Close All. Closes all open library configurations. If changes were made to some library configuration, a query about saving changes will be made before closing.
The commands for managing configurations and libraries can be called from the main menu File > Libraries.
Note that in absence of the Library explorer window in display, library configuration creation and loading operations will not be noticeable until the user opens the “Library explorer” window on the screen.
View:
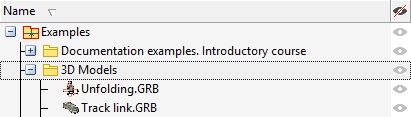
Tree. Preset hierarchy of configurations, libraries groups, libraries and files is displayed in this mode.
Libraries Only. Only libraries and their content are displayed in this mode.
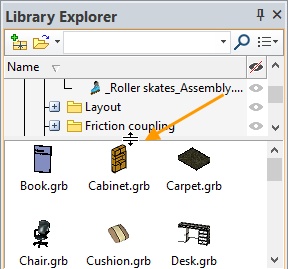
Preview. The library explorer window allows opening an additional preview pane. The preview pane displays the file image or content of libraries/libraries groups.
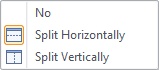
Position of the preview pane can be controlled by choosing the way the windows are split: vertical or horizontal.
Note that for the preview to appear in the preview pane, it needs to be created first. The image can be saved either as a bitmap, or as vector graphics. Different way of saving preview may be preferable in different drawing situations. Parameters for saving the drawing preview can be specified in the command ST: Set Model Status on the tab Save.
For detailed information on saving a preview or icon image refer to the chapter “Preview/Slide”.
You can change preview window size or hide it by moving separation line.
Show invisible elements ![]() / Hide invisible elements
/ Hide invisible elements ![]() .The option appears in the automenu if there are any invisible elements in library explorer. The option allows show/hide the elements in the list.
.The option appears in the automenu if there are any invisible elements in library explorer. The option allows show/hide the elements in the list.
Library Configuration Management Commands
Active Configuration ![]() . Marks selected configuration as active.
. Marks selected configuration as active.
The search for a fragment file when opening or regenerating the document begins in the active library configuration. If the element is not found, the search continues in all the rest of open configurations.
If several library configurations are open then one of those is the active one, with the icon outlined in red.
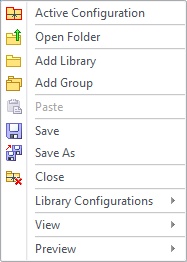
![]() Save. Saves the changes in the current library configuration.
Save. Saves the changes in the current library configuration.
![]() Save As. Saves the current library configuration in a new file.
Save As. Saves the current library configuration in a new file.
![]() Close. Closes the current library configuration.
Close. Closes the current library configuration.
Library Context Menu
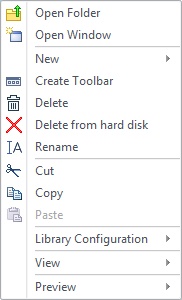
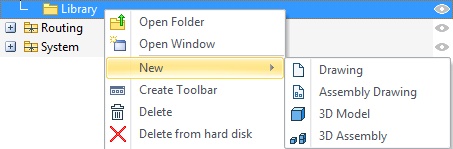
New command allows to create a new file in the library. You can select prototype from the drop-down list.
Create Toolbar ![]() . This command adds a new toolbar to the application interface. A separate button corresponds to each file from the selected library. If the document has an icon it will be displayed on the button. Name of the file is displayed on the button if there is no icon. Pressing the button will insert appropriate library element into the document as a fragment. This feature allows you to create customized toolbars based on standard and custom libraries.
. This command adds a new toolbar to the application interface. A separate button corresponds to each file from the selected library. If the document has an icon it will be displayed on the button. Name of the file is displayed on the button if there is no icon. Pressing the button will insert appropriate library element into the document as a fragment. This feature allows you to create customized toolbars based on standard and custom libraries.

Delete from hard disk ![]() . The option allows to delete libraries folders from the disk. An empty library will exist in library explorer. Its folder is colored grey. This library can be linked with folder on the disk again. For this purpose you can manually insert new path to the folder or use option
. The option allows to delete libraries folders from the disk. An empty library will exist in library explorer. Its folder is colored grey. This library can be linked with folder on the disk again. For this purpose you can manually insert new path to the folder or use option ![]() .
.

If there are libraries with duplicated names in library explorer, they are pointed with blue folder icons.
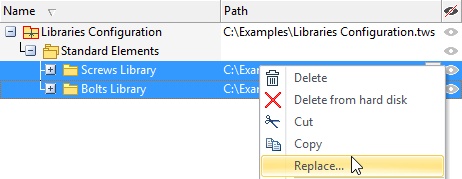
Replace command appears in context menu when you select several libraries. It allows to change path or its part for all the selected libraries.
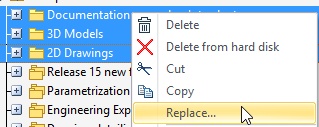
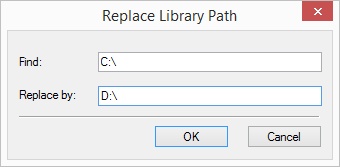
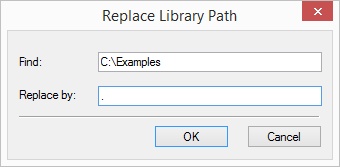
Replace Library Path dialog apears after its activation.
File Context Menu
Open command allows to open the selected file in T-FLEX CAD.
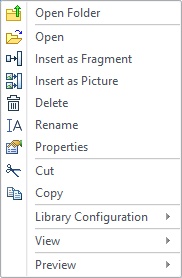
Insert as Picture ![]() activates IP: Create Picture command and inserts the selected file as a picture into the current open document.
activates IP: Create Picture command and inserts the selected file as a picture into the current open document.
Insert as Fragment ![]() allows to insert the selected file as a fragment into the current open document. 3F Insert Fragment or FR: Create Fragment command is activated according to the active - 2D or 3D - view in the document.
allows to insert the selected file as a fragment into the current open document. 3F Insert Fragment or FR: Create Fragment command is activated according to the active - 2D or 3D - view in the document.
A library name can be used in the commands for inserting external files into a T-FLEX document, such as FR: Create Fragment, IP: Insert Picture, 3F: Insert 3D Fragment. For example, if a fragment drawing fragment.grb is located on the hard disk in the catalog C:\TFW32\LIB\FRAG, and there is a library named “Parts” referencing this path, then the following name can be used for inserting the fragment: “<Parts> fragment”. This way is convenient not only in that it replaces a long and possibly kludgy path with a slick one, but also helps to save paths to fragment files upon transferring documents to another disc or computer. You just need to open the library configuration.
Properties. Calls the property dialog box of the selected file.
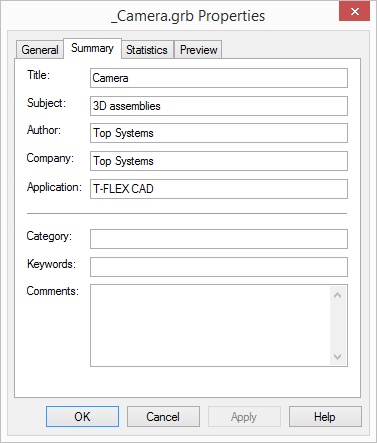
To have complete information displayed about the drawing, fill the informational fields PS: Show Model Properties. To make a preview appear in the preview pane, create it by the command PV: Save Preview.
Creation of Configurations, Groups of Libraries and Libraries
You can use option New configuration ![]() on the toolbar to create a new library configuration. You can also use Library configuration > New item from the context menu.
on the toolbar to create a new library configuration. You can also use Library configuration > New item from the context menu.
Command Add Library ![]() / Add Group
/ Add Group ![]() adds a new library/libraries group. The commands are available in context menu of configuration or libraries group. The element is created on the current library configuration hierarchy level.
adds a new library/libraries group. The commands are available in context menu of configuration or libraries group. The element is created on the current library configuration hierarchy level.
When you create library it is necessary to select folder with necessary files.
An example of library explorer elements creation can be found in “Example of configuration creation” section.
Add Files to Libraries
There are several ways to add a new GRB file into the library:
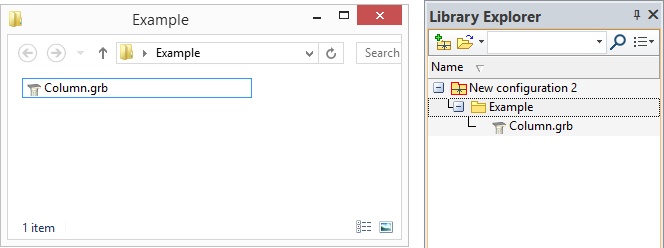
1.Add file to the catalog, which is linked with the library.
Library Explorer window is automatically updated if document files included into library were deleted, added or renamed. Thus, files added to the folder in Windows Explorer are displayed in the Library Explorer window.
2. Transfer files from Windows explorer to Library explorer window using Drag’n’drop or Copy/Paste options.

3.Create a new file using one from the prototypes using option Create from the context menu.
Moving of Library Explorer Elements
You can move libraries groups, libraries and files using Drag’n’Drop mechanism. For example, to move several files into another library, first select the group of files (hold down <Shift> or <Ctrl> key as appropriate). Then, move the cursor over the highlighted files and press ![]() . Next, hold the left mouse button down and drag the group of files into another library. This amounts to performing first “Cut”, and then “Paste” command.
. Next, hold the left mouse button down and drag the group of files into another library. This amounts to performing first “Cut”, and then “Paste” command.
Cut ![]() , copy
, copy ![]() , paste
, paste ![]() . These commands are available in context menus to move/copy libraries, libraries groups and files.
. These commands are available in context menus to move/copy libraries, libraries groups and files.
If a file is dragged into the drawing window, it will be inserted as a fragment. Dragging a file icon into the menu or toolbar area opens it for editing.
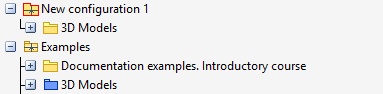
Example of configuration creation
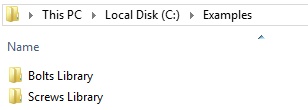
We need to create a new configuration and add “Bolts Library” and “Screws Library” into it. The folders include all necessary files and are stored on the disk.
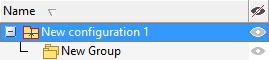
1.Create a new configuration using New Configuration ![]() command from the toolbar.
command from the toolbar.

2.Create libraries group using Add group ![]() from the configuration context menu.
from the configuration context menu.
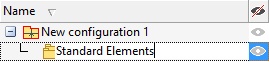
3.Rename the created libraries group using Rename ![]() command from the context menu.
command from the context menu.
4.Select Add Library ![]() item from context menu of the libraries group. Select Library Folder dialog will appear. Select folder and press [Select folder]. The selected folder with all its files will be added to library explorer.
item from context menu of the libraries group. Select Library Folder dialog will appear. Select folder and press [Select folder]. The selected folder with all its files will be added to library explorer.
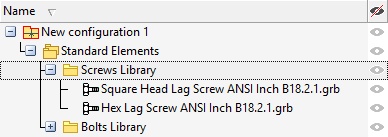
All the files that will be subsequently added to the selected catalogs will also be displayed in library explorer.
5.Save the configuration after adding all necessary libraries. Configurations are stored in textual TWS file, which contains information about included libraries. To save the configuration, use Save as command from the context menu of the configuration and select folder where it will be stored. You can also change name of the configuration upon saving.
It is recommended to store configuration files and their libraries folders on the same level.

Specifying Relative Paths to the Catalog
A relative path to the library or libraries group catalog can be specified with respect to the installation home of the T-FLEX CAD application, or with respect to the configuration file that includes this library. A relative path allows use of symbols “*”, “..” and “.”.
The symbol “*” in the beginning of the path stands for the path to the T-FLEX CAD home.
The symbol “.” denotes the path to the folder of the library configuration file.
The symbol “..” means ascending one level up the folder.
Suppose, for example, that the T-FLEX CAD application is installed in the С:\Program Files\T-FLEX Parametric CAD 3D folder, and a library configuration is stored in the file С:\Library\A library1.tws. In this case, the relative paths to libraries and groups of libraries are written out as follows:
Path relative to T-FLEX CAD home folder |
Path relative to the library configuration file |
Absolute path |
*\Library\Bolts |
.\..\ Program Files\T-FLEX Parametric CAD 3D\Library\Bolts |
C:\Program Files\T-FLEX Parametric CAD 3D\Library\Bolts |
*\..\..\Screws |
.\..\Screws |
C:\Screws |
*\..\..\Library\Rods |
\Rods |
С:\Library\Rods |
*\..\..\Library\Bolts\Normal |
\Bolts\Normal |
С:\Library\Bolts\Normal |
In the case of inputting a path to a non-existent folder, the system changes library icon to grey folder.
You can change paths using one of the following ways:
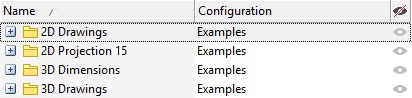
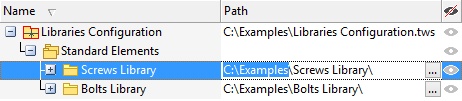
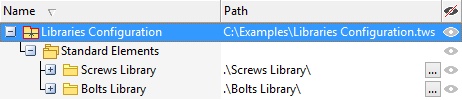
Activate “Path” column displaying in library explorer. Here you can change path to the folder.
Configuration file is located on the disk on the same level with its libraries. So that you can change path from “C:\Examples” to “.”.
Change paths for several libraries at once. You need to select the libraries with hold down <CTRL> button and select Replace… item in their context menu.
Replace Library Path dialog appears. Here you can input an old path or its part and replace it with a new one.
After that select Save option in the context menu of the configuration to save configuration changes. Relative paths will be saved in the configuration file.