Automatic Laying of Routes |
  
|
Automatic Laying of Routes |
|
Routing command performs automatic laying of route between selected nodes. To set path of the middle route segment you can use also harnesses.
To access the command:
Icon |
Ribbon |
|---|---|
|
Routing → Construct → Routing |
Keyboard |
Textual Menu |
|
Tools > Routing > Routing |
The algorithm of working with the command can be represented as follows:
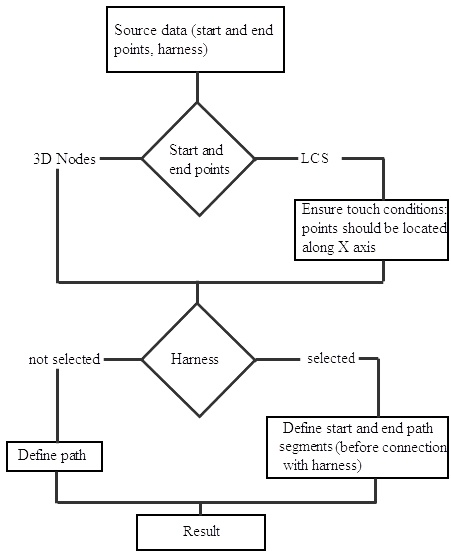
Consider an example.
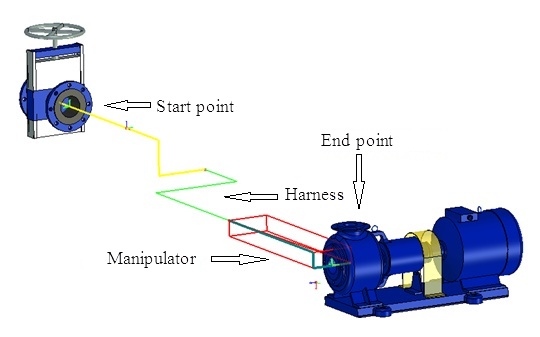
The route will go between the two LCSs. Part of the route will pass through the harness.
After calling the command, the following options are available:
|
<F> |
Select start point |
|
<S> |
Select end point |
|
<D> |
Cancel start and end points |
|
<L> |
Select harness |
|
<C> |
Cancel harness selection |
|
<N> |
Next |
|
<P> |
Back |
|
<R> |
Resume command operation after applying changes |
In Parameters dialog you can set parameters of the route being created:
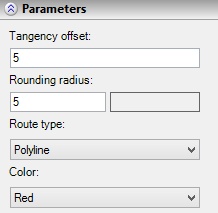
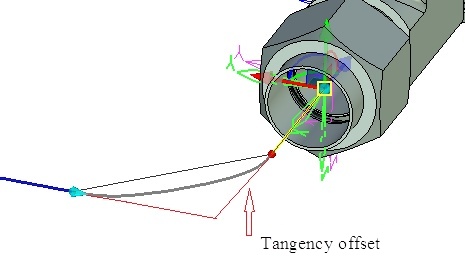
- Tangency Offset – specifies the distance by which the segment of the route offsetss from the intersection point with another segment to build tangential coupling between them.
- Rounding Radius – sets radius of rounding at the route break points.
- Route Type: polyline, spline by points, spline by polyline - can be set separately for each route segment.
- Color – sets route color by default.
Laying the route takes place in several stages. At each stage a segment of the route is constructed. The segment is laid along the edges of the manipulator-box or rectangle. This manipulator appears for each route segment. You can select edges, by which the route will be laid, and set the length of the edges.
After the initial data for constructing the route - start LCS ![]() , end LCS
, end LCS ![]() and harness
and harness ![]() - are set press button
- are set press button ![]() Next.
Next.
After that you will see manipulator-box, with which you need to specify the variant of the route approach to the first point along axis X. To specify the variant, you must select appropriate edges of the manipulator.
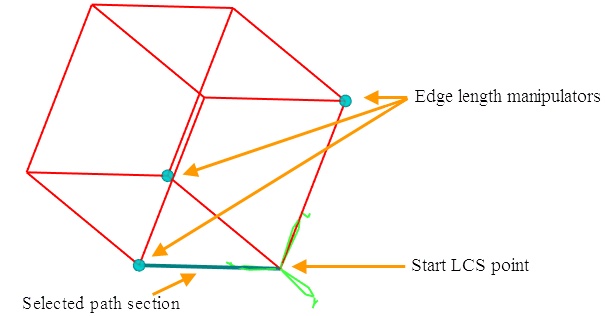
Length of edges can be changed either directly with manipulator or in the Properties window.
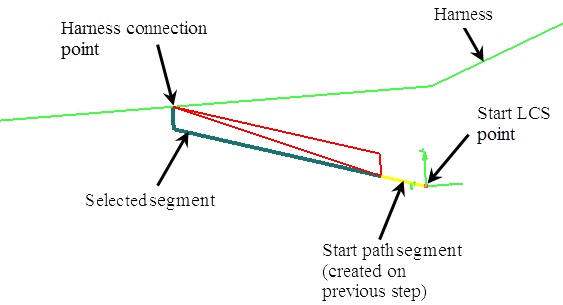
After selecting necessary variant, press ![]() and repeat the steps for the second point. At the next two steps, system automatically finds the nearest points for connecting with harness and provides a way to define path segments for these points. The action is performed similar to the previous one, by selecting edges of the box. Similarly, you can construct path for the route without using harness.
and repeat the steps for the second point. At the next two steps, system automatically finds the nearest points for connecting with harness and provides a way to define path segments for these points. The action is performed similar to the previous one, by selecting edges of the box. Similarly, you can construct path for the route without using harness.
The final step - a preview of the result. You can confirm the creation of the route by pressing ![]() , or with option
, or with option ![]() Return to the previous steps to adjust any settings.
Return to the previous steps to adjust any settings.
After creation the route is available for editing by standard tools of editing routes: you can change the types of segments, add rounding, etc.