Here, we will just remind that the table of welds is created using the command “WT: Create Weld Table”:
Icon |
Ribbon |
|---|---|
|
Assembly → Assembly → Weld → Weld |
Keyboard |
Textual Menu |
<WT> |
Tools > Weld > Weld Table |
By using this command you can create the table of welds in the current T-FLEX CAD document, or export it into an MS Excel document.
All 2D welds and the standard 3D welds are entered in the welds table.
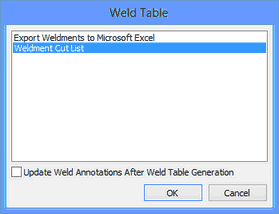
After this command is invoked, the dialog window appears in which the user has to choose the method of creation of the table of welded seams. Initially two options are present:
Simple table of welded seams. Welded seam table is created on the first 2D page of the current document. Approximate appearance of this table is shown on the figure below.


Export of welded seams into Microsoft Excel. Welded seam table is exported into the document of Excel.
Creation of welded seam table in both cases is carried out with the help of macros found in the folder “…/T-FLEX CAD 15/Program/WeldReport”. If necessary, these macros can be modified independently by defining inside them another type of a welded seams table. It is also possible to create user’s own macros for creation of welded seams table and place them into the same folder. In this case in the aforementioned dialog the additional options will be present that correspond to the user’s macros.
The work with macros is described in more detail in the “Macros” chapter.