Creating Parametric Drawing with Construction Entities |
  
|
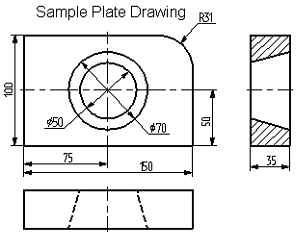
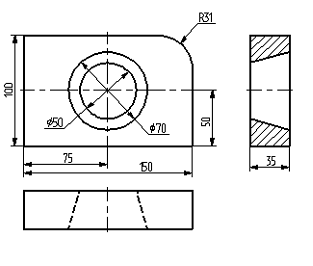
The following diagram shows a drawing to be created. It is a plate with a through hole of conical shape. The drawing will be defined parametric so that any modifications will automatically reflect on all projections.
Let’s begin with the main (elevation) view of the plate. First, create the necessary “thin” construction lines, and then draw the graphic lines on top. Next, create the other two views using the construction lines of the main view. This creates a dependency between the views so that the two views automatically adjust to the main view modifications. Finally, apply text and dimensions.
As was mentioned, any command can be called by a number of ways. It can be typed on the keyboard, selected from the textual menu, or picked on a toolbar.
Let’s begin with the command Construct Line. To invoke the command, use:
Icon |
Ribbon |
|---|---|
|
Draw > Construct > Line |
Keyboard |
Textual Menu |
<L> |
Construct > Line |
Pick the icon ![]() at the top of the automenu. A crosshair appears that follows cursor dynamically. The current coordinates of the crosshair crossing point are displayed in the status bar. There are several ways to define the crossing point. One is to simply place the cursor near the center of the drawing window and press
at the top of the automenu. A crosshair appears that follows cursor dynamically. The current coordinates of the crosshair crossing point are displayed in the status bar. There are several ways to define the crossing point. One is to simply place the cursor near the center of the drawing window and press ![]() . To define the crossing point more precisely, specify its coordinates in the parameters window. The coordinates can also be specified via a parameter dialog invoked by typing <P> key or picking the icon
. To define the crossing point more precisely, specify its coordinates in the parameters window. The coordinates can also be specified via a parameter dialog invoked by typing <P> key or picking the icon ![]() in the automenu.
in the automenu.
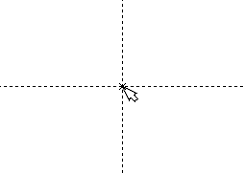

As a result, two crossing construction lines will be created. Besides, a node is created at the intersection point. These lines make the basis of the view being created. The line parameters represent the absolute coordinates. The view can be moved around on the drawing by moving the base lines.
Do not use more than two base lines on the main (independent) view, and more than one base line on the views defined by projections. This will insure freedom in placing the drawings.
A T-FLEX CAD command stays active up until it is quit or another command is called. Quitting the crosshair mode (as by pressing ![]() once) cancels the crosshair rubberbanding, but the line creation command stays active. After canceling the crosshair mode, move the cursor close to the vertical line. The line will get highlighted, and a pop-up help will appear next to cursor displaying the name of the highlighted entity. This is object snapping in action. This behavior relieves the user from typing on keyboard or using the automenu buttons.
once) cancels the crosshair rubberbanding, but the line creation command stays active. After canceling the crosshair mode, move the cursor close to the vertical line. The line will get highlighted, and a pop-up help will appear next to cursor displaying the name of the highlighted entity. This is object snapping in action. This behavior relieves the user from typing on keyboard or using the automenu buttons.
The object snapping is on by default when starting the application. To set or unset this mode manually, use the button ![]() on the “View” toolbar.
on the “View” toolbar.
Pressing ![]() now starts rubberbanding of a line that follows the cursor while staying parallel to the selected one. We are now creating a line parallel to a vertical line. Such a relationship between the two construction lines, established at the creation time, is an example of an important feature of T-FLEX CAD system. This defines behavior of a set of construction entities under parametric modifications.
now starts rubberbanding of a line that follows the cursor while staying parallel to the selected one. We are now creating a line parallel to a vertical line. Such a relationship between the two construction lines, established at the creation time, is an example of an important feature of T-FLEX CAD system. This defines behavior of a set of construction entities under parametric modifications.
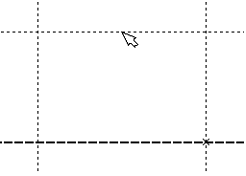
Place the new line at the left of the highlighted vertical line by pressing ![]() . The exact value of the distance can be specified in the parameters window or parameter dialog box. The newly created line will become the left-hand side of the part.
. The exact value of the distance can be specified in the parameters window or parameter dialog box. The newly created line will become the left-hand side of the part.
Pressing ![]() once cancels the parallel line creation mode, yet the line creation command stays active. (Otherwise, call it again.) Next, move the cursor toward the horizontal line and press
once cancels the parallel line creation mode, yet the line creation command stays active. (Otherwise, call it again.) Next, move the cursor toward the horizontal line and press ![]() . The line is selected as a reference for a parallel line to be created. Move the cursor up, specify an exact value of the distance, if necessary, using the parameters window, and press
. The line is selected as a reference for a parallel line to be created. Move the cursor up, specify an exact value of the distance, if necessary, using the parameters window, and press ![]() fixing the top side of the part.
fixing the top side of the part.
The next step is to round a corner of the plate with a fillet. For this purpose, let’s use the command Construct Circle. Call the command via
Icon |
Ribbon |
|---|---|
|
Draw > Construct > Circle |
Keyboard |
Textual Menu |
<C> |
Construct > Circle |
To draw the fillet at the upper-right corner of the plate, construct a circle tangent to the top and the right-hand-side lines. Move the cursor to the top line and press ![]() or <L>. This starts rubberbanding of a circle whose radius adjusts as the circle follows the cursor while the line tangency stays intact. This means a circle is being constructed that is tangent to the top line. Any future modifications of the top line location will not break the circle tangency condition.
or <L>. This starts rubberbanding of a circle whose radius adjusts as the circle follows the cursor while the line tangency stays intact. This means a circle is being constructed that is tangent to the top line. Any future modifications of the top line location will not break the circle tangency condition.
Next, move the cursor to the right-hand-side line and again press ![]() or <L>. Now, the circle becomes “tied” to the two construction lines and keeps the tangencies while being rubberbanded. Pressing
or <L>. Now, the circle becomes “tied” to the two construction lines and keeps the tangencies while being rubberbanded. Pressing ![]() fixes the current circle radius. The exact value of the radius can be specified in the parameters window.
fixes the current circle radius. The exact value of the radius can be specified in the parameters window.
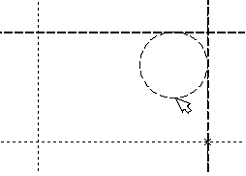

If the resulting construction does not match the illustration, use Undo Changes command,
Icon |
Ribbon |
|---|---|
|
|
Keyboard |
Textual Menu |
<UN>, <Ctrl><Z>, <Alt><BackSpace> |
Edit > Undo |
Each call to this command brings the system one step back. If this command was called mistakenly, its action can be reversed with the command Redo Changes,
Icon |
Ribbon |
|---|---|
|
|
Keyboard |
Textual Menu |
<RED>, <Ctrl><BackSpace> |
Edit > Redo |
This command restores the action that was mistakenly undone.
One can remove all construction lines and start creating a drawing from the beginning with the command Delete Unused Construction:
Icon |
Ribbon |
|---|---|
|
Edit > Additional > Purge |
Keyboard |
Textual Menu |
<PU> |
Edit > Purge |
This command will delete all construction entities and allow to start drawing anew. A specific construction entity can be deleted using command Edit Construction:
Icon |
Ribbon |
|---|---|
|
Draw > Additional > 2D Construction |
Keyboard |
Textual Menu |
<EC> |
Edit > 2D Construction |
Once the command is called, select the entity and delete it by pressing <Delete> key on the keyboard or by picking the icon ![]() in the automenu.
in the automenu.
Now, draw the graphic lines on top of the completed construction portion of the drawing. To do so, let’s create graphic lines by calling Create Graphic Line. Call the command via
Icon |
Ribbon |
|---|---|
|
Draw > Draw > Graphic Line |
Keyboard |
Textual Menu |
<G> |
Draw > Graphic Line |
Note that the previous command is automatically terminated when calling another command via the toolbar icon button or the textual menu (no need to cancel the previous one explicitly).
Start drawing solid lines from the upper-left corner of the plate. The graphic lines snap automatically to a closest intersection of the construction lines. Simply move cursor to an intersection and press ![]() . The line will be rubberbanded after the cursor. Just keep selecting nodes or construction line intersections.
. The line will be rubberbanded after the cursor. Just keep selecting nodes or construction line intersections.
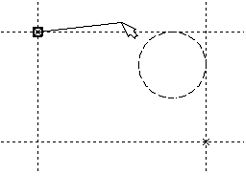
It is not recommended to select multiple (more than two) line intersections neither by pressing <Enter> nor by right click. In this case, we recommend creating nodes at such intersections first. The graphics can then be applied using the <N> key. When using the <Enter> key in “free drawing” mode, a “loose” node will be created that is not constrained to any construction line. Following these tips insures correct parametric function of the drawing under modifications.
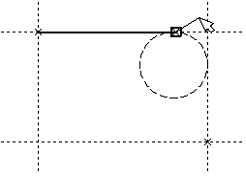
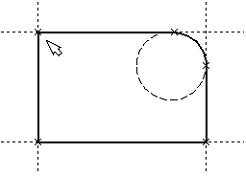
Move cursor to the tangency point between the top line and the circle, and press ![]() . What you see on screen now should be similar to the illustration at right. Note that T-FLEX system automatically adds nodes to the end points of the graphic lines, unless already created.
. What you see on screen now should be similar to the illustration at right. Note that T-FLEX system automatically adds nodes to the end points of the graphic lines, unless already created.
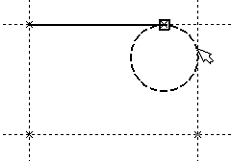
Now let’s draw a graphic line along the circle to construct an arc between the two tangency points. To do so, move the cursor to the circle and press <C> key. The circle will then get highlighted. The direction of arc creation depends on the position of the cursor when selecting the circle. To change the arc direction, press the <Tab> key.
Place the cursor just above and to the left of the second tangency point as shown.
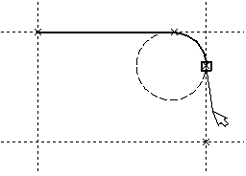
Then press ![]() , and the graphic arc will be created in the clockwise (CW) direction, spanning to the second tangency point. The result should look like on the diagram.
, and the graphic arc will be created in the clockwise (CW) direction, spanning to the second tangency point. The result should look like on the diagram.
Continue drawing. Select with ![]() the lower-right corner of the plate, then the lower-left one, and finish the construction in the upper-left corner where the drawing started. To complete the command press
the lower-right corner of the plate, then the lower-left one, and finish the construction in the upper-left corner where the drawing started. To complete the command press ![]() .
.
The drawing should look as shown here.
If applying graphic lines did not come out as necessary, edit the graphics using the command Edit Graphic Line. Call as follows,
Icon |
Ribbon |
|---|---|
|
- |
Keyboard |
Textual Menu |
<EG> |
Edit > Draw > Graphics |
Move the cursor to one of the lines to be edited, and press ![]() . This selects the line. It can then be deleted by pressing <Delete> key or picking the icon
. This selects the line. It can then be deleted by pressing <Delete> key or picking the icon ![]() in the automenu. Repeat for each line to be edited. If a whole area is to be edited, use box selection. To select by box, press
in the automenu. Repeat for each line to be edited. If a whole area is to be edited, use box selection. To select by box, press ![]() where one of the box corners should be, hold and drag to the necessary location of the opposite corner, then release the button. As you drag the cursor, it rubberbands a rectangle of the selection box. The elements will be selected that are fully within the box. All these elements can be deleted at once.
where one of the box corners should be, hold and drag to the necessary location of the opposite corner, then release the button. As you drag the cursor, it rubberbands a rectangle of the selection box. The elements will be selected that are fully within the box. All these elements can be deleted at once.
To apply graphic lines again, call the command Create Graphic Line. To redraw the screen at any moment use the <F7> key, in case not all lines are displayed properly after editing.
Once the necessary image is obtained, proceed to the next step of drawing creation. The drawing can be saved preliminary with the help of Save Model command:
Icon |
Ribbon |
|---|---|
|
|
Keyboard |
Textual Menu |
<SA> |
File > Save |
Congratulations! You have accomplished your first drawing in T-FLEX CAD. Now let us briefly describe the system editing capabilities.
The current drawing uses five construction entities that define the shape and size of the part. These are the left-hand side, the right-hand side, the top, the bottom and the fillet radius. To modify construction entities call the command Edit Construction:
Icon |
Ribbon |
|---|---|
|
Draw > Additional > 2D Construction |
Keyboard |
Textual Menu |
<EC> |
Edit > 2D Construction |
Move the cursor to the left-hand-side vertical line and press ![]() . The line gets highlighted. As you move the cursor left to right, the line will move along. Specify the new position of the line by pressing
. The line gets highlighted. As you move the cursor left to right, the line will move along. Specify the new position of the line by pressing ![]() . The width of the plate will change. Note that modifying locations of construction entities causes instant update of their respective “snapped” graphic lines. If you try to move the right-hand side of the plate then the whole plate will move. This is because the left-hand side was created as a dependent of the right-hand one, and the dependency stays as the right-hand side is modified. However, the left-hand side can move independently of the right. Try such manipulations with other construction entities, including the circle. As the construction entities move the size and shape of the plate will be changing while maintaining the dependencies defined at the construction time.
. The width of the plate will change. Note that modifying locations of construction entities causes instant update of their respective “snapped” graphic lines. If you try to move the right-hand side of the plate then the whole plate will move. This is because the left-hand side was created as a dependent of the right-hand one, and the dependency stays as the right-hand side is modified. However, the left-hand side can move independently of the right. Try such manipulations with other construction entities, including the circle. As the construction entities move the size and shape of the plate will be changing while maintaining the dependencies defined at the construction time.
After testing modification capabilities of the system please bring the drawing back into an approximately original configuration as shown on a diagram above. Let’s proceed with the next element of the drawing, which is the conical hole in the middle of the plate.
First, let’s define the center of the circle to be constructed. To do so, let’s do auxiliary construction to define the center point of the plate. T-FLEX CAD provides a handy command to create a line in the middle of two others. For two parallel lines, this command creates a parallel line in between at equal distances to the two. For intersecting ones, the resulting line passes through the intersection at equal angles to the two original lines. Thus, the new line appears as the symmetry line for the two.
Call the command Construct Line and choose the icon ![]() in the automenu. Move the cursor to the right-hand side of the plate and select the vertical line by
in the automenu. Move the cursor to the right-hand side of the plate and select the vertical line by ![]() . A parallel line appears rubberbanding after the cursor. Move the cursor to the left-hand side of the plate without fixing the rubberbanded line. Now, select the left-hand-side vertical line with
. A parallel line appears rubberbanding after the cursor. Move the cursor to the left-hand side of the plate without fixing the rubberbanded line. Now, select the left-hand-side vertical line with ![]() . This creates a new vertical line on the drawing that is the symmetry line for the two selected ones.
. This creates a new vertical line on the drawing that is the symmetry line for the two selected ones.
Follow same way to create a horizontal line as the symmetry line for the top and bottom sides of the plate. The intersection point of the two new lines will be the center of the hole to be constructed.
Next, call the circle creation command, move cursor to the intersection of the symmetry lines, and press ![]() . This starts rubberbanding of a circle with the fixed center, with the radius adjusting to the cursor position.
. This starts rubberbanding of a circle with the fixed center, with the radius adjusting to the cursor position.
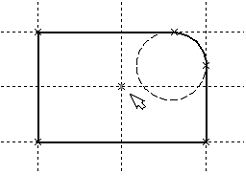
The circle center snaps to the node created automatically at the intersection of the symmetry lines. Fix the circle with ![]() . Just like line-to-line distances, the circle radius (diameter) can be defined approximately by mouse operation, and exactly in the parameters window. Note that after pressing
. Just like line-to-line distances, the circle radius (diameter) can be defined approximately by mouse operation, and exactly in the parameters window. Note that after pressing ![]() the command Construct Circle stays active.
the command Construct Circle stays active.
The second circle of the conical hole can be constructed as concentric to the first one. To do so, pick the icon ![]() in the automenu or type <O>. Then select the existing circle with
in the automenu or type <O>. Then select the existing circle with ![]() . The new circle starts rubberbanding after the cursor. Place the cursor so that the rubberbanded circle is slightly bigger than the original one, and fix with
. The new circle starts rubberbanding after the cursor. Place the cursor so that the rubberbanded circle is slightly bigger than the original one, and fix with ![]() . The exact radius difference can be managed via the parameters window.
. The exact radius difference can be managed via the parameters window.
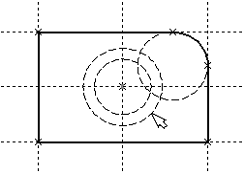
Proceed with the command Create Graphic Line, move cursor to the bigger of the two circles, and press ![]() or <C>. The circle gets drawn in solid. Then, move the cursor to the smaller circle, and again press
or <C>. The circle gets drawn in solid. Then, move the cursor to the smaller circle, and again press ![]() or <C>. Now both circles are drawn solid. From this point, we can proceed with the two other views of the plate.
or <C>. Now both circles are drawn solid. From this point, we can proceed with the two other views of the plate.
The two other views are not required for constructing a parametric drawing in T-FLEX CAD. In this example, creating the side and the plan views simply help demonstrating additional advantages of parametric modeling using T-FLEX CAD system.
Since the straight lines are considered infinite, one can see that the other views (side and plan) are already partially created. To finalize the drawing, we will need to establish additional dependencies between the construction lines. These additional steps are described next.
Activate the line creation command and move the cursor to the construction line defining the right-hand side of the plate. Select it with ![]() . This highlights the vertical construction line and starts rubberbanding of a new line parallel to the selected one. This line will be the right-hand side of the plate side view. Fix it at a necessary location by pressing
. This highlights the vertical construction line and starts rubberbanding of a new line parallel to the selected one. This line will be the right-hand side of the plate side view. Fix it at a necessary location by pressing ![]() . As before, the exact distance from the selected line can be specified in the parameters window.
. As before, the exact distance from the selected line can be specified in the parameters window.
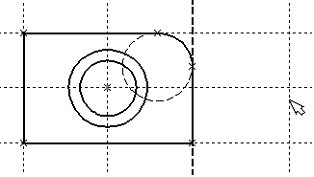
The new line is created relative to the right-hand side of the plate on the main view. Therefore, when the right-hand side of the plate is moved, the new line will follow, staying at the same distance. To place the new line at a different distance, use the command for editing construction lines. After that, moving the right-hand side of the plate will again preserve the new distance. The dependencies between construction entities stay valid until redefined in the construction line editing command.
The next step is creating the line of the left-hand-side edge of the part on the side view. After completing one line, a new line rubberbanding began automatically.
Note that the currently rubberbanded second line is also a dependent of the plate right-hand-side line as the latter is still highlighted. This is not our intention; therefore, press ![]() to start line creation anew. Select the last created line – the one marking the right-hand side of the side view - by clicking
to start line creation anew. Select the last created line – the one marking the right-hand side of the side view - by clicking ![]() on it. Rubberband the new line up to the approximate location, and fix with
on it. Rubberband the new line up to the approximate location, and fix with ![]() , or enter exact value in the parameters window.
, or enter exact value in the parameters window.
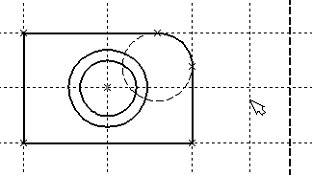
We recommend using specifically the right-hand side of the part main view as the base line, and construct all the rest vertical lines with respect to it. In this way, the line-to-line distances will be positive which is preferable in some situations.
Now let’s proceed with constructing the projection of the conical hole. First, let’s create horizontal lines tangent to the top and bottom of the inner and outer circles of the hole. These lines will be used as guides for the side view of the hole.
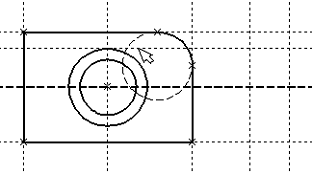
Press ![]() once to restart line creation, move the cursor to the horizontal symmetry line, and select it by pressing
once to restart line creation, move the cursor to the horizontal symmetry line, and select it by pressing ![]() or typing <L>. The line gets highlighted. Rubberband the new line by moving cursor to the outer circle and type <C>. The line is created parallel to the horizontal symmetry line and tangent to the circle.
or typing <L>. The line gets highlighted. Rubberband the new line by moving cursor to the outer circle and type <C>. The line is created parallel to the horizontal symmetry line and tangent to the circle.
Repeat the same sequence of actions three more times: for the top tangency with the inner circle, and the two bottom tangencies.
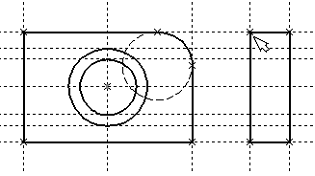
Now we have the necessary guides for applying graphics on the side view.
Call Create Graphic Line command and apply solid lines between the four corners of the plate side view. Simply move the cursor from corner to corner clicking ![]() on each corner node, and then quit with
on each corner node, and then quit with ![]() .
.

Next, apply the two lines representing the conical hole. The view is now almost complete, with only the hatch yet to be created.
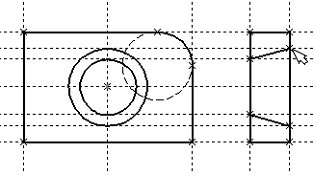
The hatch is created by Create Hatch command. Use
Icon |
Ribbon |
|---|---|
|
Draw > Draw > Hatch |
Keyboard |
Textual Menu |
<H> |
Construct > Hatch |
Set the following option, unless on by default,
![]() <A> Automatic Contour search mode
<A> Automatic Contour search mode
Then move the cursor to the top portion of the side view, place within the area to be hatched, and press ![]() . The top contour gets highlighted. Next, type <P> to invoke the hatch area parameters dialog. Specify the type and scale factor of the hatch. Pressing
. The top contour gets highlighted. Next, type <P> to invoke the hatch area parameters dialog. Specify the type and scale factor of the hatch. Pressing ![]() in the automenu completes hatching of the selected area.
in the automenu completes hatching of the selected area.
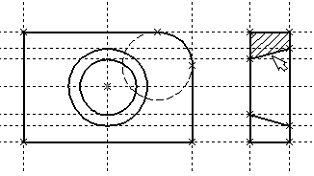
Repeat the same actions to hatch the bottom portion of the plate.
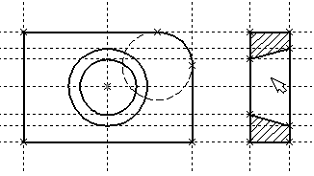
It is also possible to create a single hatch consisting of two contours, instead of creating two separate hatches. To do so, one could select the second contour right after the first one, and then press <End> key or pick ![]() icon in the automenu.
icon in the automenu.
Once the hatch is created, proceed with the plan view. Call the line creation command “Construct Line”. Select the bottom line of the main view in order to create dependency of the plan view on the main view. Rubberband the new line to a location below the main view and fix with ![]() . Then quit next parallel line creation with
. Then quit next parallel line creation with ![]() .
.
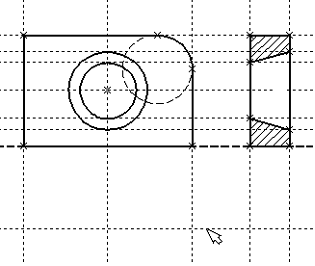
Let’s try creating the plan view in such a way that modifications of other views propagated on the plan view via the established dependencies. The simplest way to create a dependency in projective drawing is creating a slanted line at 45-degree angle to the side lines of the side and plan view. The rest of auxiliary construction is done with respect to this slanted line.
Let’s again use the symmetry line creation functionality, this time with a slanted symmetry line in mind. Since the lines of the side and the plan views are orthogonal, the resulting symmetry line will pass at the intended 45-degree angle.
Call the option ![]() . Point at the right-hand-side line of the side view and select with
. Point at the right-hand-side line of the side view and select with ![]() or <L>. The line will get highlighted. Next, select the bottom line of the plan view by same means. A new line will be created passing through the intersection of the two selected lines at 45 degree to each.
or <L>. The line will get highlighted. Next, select the bottom line of the plan view by same means. A new line will be created passing through the intersection of the two selected lines at 45 degree to each.
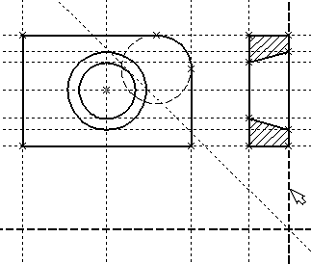
Let’s create all necessary nodes at intersections while within the line creation command. The relevant intersection points are those on the right-hand-side line of the side view and the newly created slanted line. To create a node, place the cursor at an intersection and press the <Space> bar.
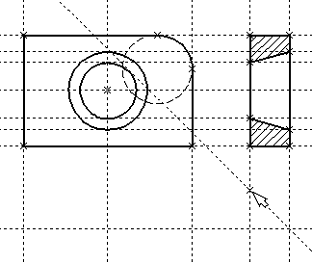
Another way of creating nodes is using command Construct Node via:
Icon |
Ribbon |
|---|---|
|
Draw > Construct > Node |
Keyboard |
Textual Menu |
<N> |
Construct > Node |
You should still be within the command Construct Line. Point the cursor at and select the bottom line of the plan view. This way we can create a line parallel to the bottom-side one. Now, move the cursor to the newly created node and type <N>. This creates a line parallel to the selected one and passing through the specified node. Thus, the top and the side view become parametrically related.
To witness this, call the construction line editing command Edit Construction. Try changing location of the left-hand-side line of the side view. To do so, select it, move and fix in the new position. Note now that the corresponding line on the plan view moves accordingly.
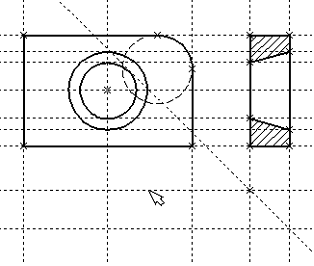
Construction of the conical hole on the plan view follows the same steps as on the side view. Select a vertical line while in the construction line creation command, and create four parallel lines tangent to the two circles.
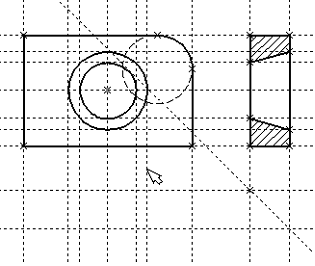
Now one can draw all graphic lines on the plan view. Use the command Create Graphic Line to draw the perimeter of the plan view.
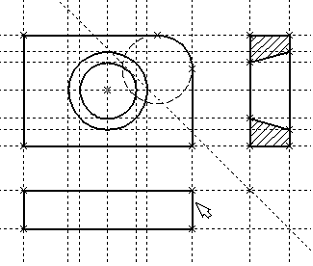
Next step is to apply the two dashed lines corresponding to the conical hole. Set the “HIDDEN” line type in the system toolbar.

Then create the two dashed lines representing the conical hole.
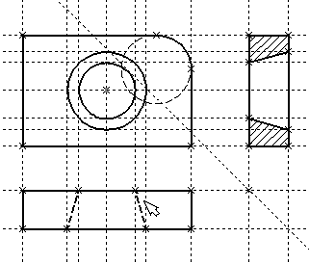
Now, let’s create centerlines. Call Create Axis command:
Icon |
Ribbon |
|---|---|
|
Draw > Draw > Axis |
Keyboard |
Textual Menu |
<АХ> |
Draw > Axis |
Set the automenu option:
![]() <I> Create Axis of two Graphics lines
<I> Create Axis of two Graphics lines
Use ![]() to select the left and then the right-hand side of the elevation view. Push the
to select the left and then the right-hand side of the elevation view. Push the ![]() automenu button. This creates a centerline on the elevation view. Similarly, create a horizontal centerline on the elevation view and those on the side and plan views.
automenu button. This creates a centerline on the elevation view. Similarly, create a horizontal centerline on the elevation view and those on the side and plan views.
One could notice that all construction lines created so far were infinite. For convenience, an option is provided in the command Edit Construction for trimming construction lines at outermost nodes. This works as follows,
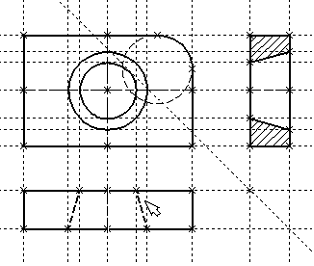
1.Call Edit Construction command.
2.Selecting one particular line and typing <T> or pushing ![]() trims this selected line only.
trims this selected line only.
3.Using option ![]() trims all lines.
trims all lines.
4.If you want to revert to the infinite line setting, call the command Set Document Parameters:
Icon |
Ribbon |
|---|---|
|
Edit > Document > Document Parameters
|
Keyboard |
Textual Menu |
<ST> |
Customize > Document Parameters |
Go to the parameter View > Construction Lines > Length and set it to “Default infinite”. Alternatively, enter the command Edit Construction, select necessary lines, type <P> and specify an appropriate setting.
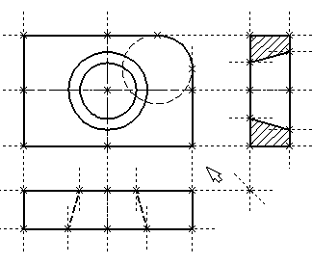
The diagram shows a drawing with construction lines trimmed. It appears less crowded, although all necessary construction entities are present. By default, construction lines are not output to the printer or plotter, regardless of their length.
Next, let’s create the necessary dimensions on the drawing as follows:
1. First, let’s create linear dimensions. Call the command Create Dimension:
Icon |
Ribbon |
|---|---|
|
Draw > Title Block > Dimension |
Keyboard |
Textual Menu |
<D> |
Construct > Dimension |
One can select any pair of construction lines or graphic lines to create a linear or angular dimension. Select the two outermost lines on the main view by ![]() . This starts rubberbanding of a dimension following the cursor motion. To change any dimension parameter, type <P> or push the
. This starts rubberbanding of a dimension following the cursor motion. To change any dimension parameter, type <P> or push the ![]() button in the automenu. The dimension parameters dialog box will appear on screen. Specify the necessary parameters, close the dialog, and fix dimension placement with
button in the automenu. The dimension parameters dialog box will appear on screen. Specify the necessary parameters, close the dialog, and fix dimension placement with ![]() . To change the size of the dimension string font, use the command Set Document Parameters, the Font tab. The font parameters can be specified on this tab for the elements that did not have such parameters set originally.
. To change the size of the dimension string font, use the command Set Document Parameters, the Font tab. The font parameters can be specified on this tab for the elements that did not have such parameters set originally.
2. Repeat the steps of the item 1 for the rest of the linear dimensions.
3. Diameter and radius dimension creation is also straightforward. While in Create Dimension command, move the cursor to a circle to be dimensioned, and type <C> or click ![]() . The circle gets selected, and a dimension begins rubberbanding after the cursor. Switch between the radius and diameter dimension types by typing <R> and <D> or picking
. The circle gets selected, and a dimension begins rubberbanding after the cursor. Switch between the radius and diameter dimension types by typing <R> and <D> or picking ![]() and
and ![]() buttons of the automenu as appropriate. Typing <M> loops through the possible witness/leader line configurations for the entity to be dimensioned. The <Tab> key handles the direction of the dimension leader line jog. Point the cursor at the necessary location and press
buttons of the automenu as appropriate. Typing <M> loops through the possible witness/leader line configurations for the entity to be dimensioned. The <Tab> key handles the direction of the dimension leader line jog. Point the cursor at the necessary location and press ![]() . The newly created dimension will be displayed on the screen. Repeat this procedure to dimension all circles.
. The newly created dimension will be displayed on the screen. Repeat this procedure to dimension all circles.
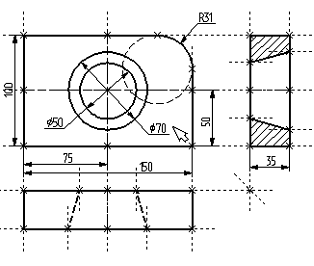
After finishing construction of all major elements, one can hide all construction entities using the command Set Levels:
Icon |
Ribbon |
|---|---|
|
Edit > Document > Levels |
Keyboard |
Textual Menu |
<SH> |
Customize > Levels |
This command controls visibility of various elements. An element visibility depends on the “level” at which it is residing.
After calling the command, a dialog box appears on screen that allows setting a range of visible levels for each element type of the model.
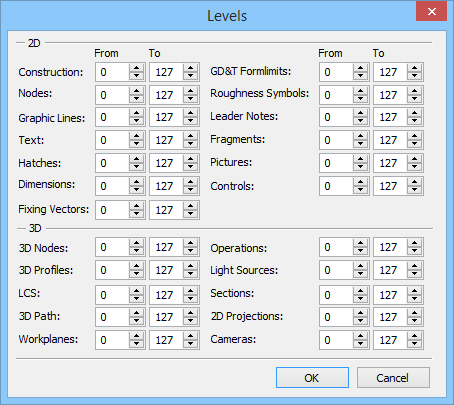
Think of levels as transparent films with images drawn on them. The complete drawing consists of all of them overlapped. The system permits making one or more levels invisible, displaying only intended ones. A drawing may consist from up to 255 levels enumerated from -126 to 127.
All elements in T-FLEX CAD are automatically created on the level “0”. One can re-assign any element to another level at any time. In our example, we did not change levels of any element; therefore, all created elements fell in the level “0”.
As appears on the diagram above, all elements are visible by default whose level is in the range from 0 to 127. Setting the low limit of the visible range to 1 for construction lines and nodes hides the construction lines and nodes, because they reside on the level 0 which is not within the new range.
A simpler way to hide construction lines and nodes is to use a dedicated command. This command hides or shows all construction entities in the current window. It is preferable in the situations when hiding construction should not affect the document data, rather, the current window only.
It is thus possible to open the same document in several windows, and have construction entities displayed in some windows, and hidden in others.
Call the command via
Icon |
Ribbon |
|---|---|
|
- |
Keyboard |
Textual Menu |
<Ctrl><Shift><C> |
View > Hide Construction |
5. Let’s make a line of text containing the name of the drawing using command Create Text. Call the command via
Icon |
Ribbon |
|---|---|
|
Draw > Title Block > Text |
Keyboard |
Textual Menu |
<TE> |
Construct > Text |
In the automenu of the command, turn on the option:
![]() <D> Create string text
<D> Create string text
A text can be “snapped” to any construction entity on the drawing in order to have it move together with the drawing elements being modified.
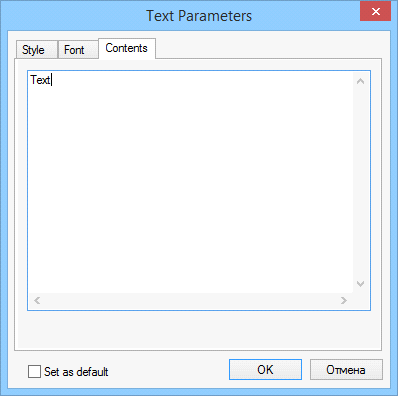
Move cursor to the intersection of the vertical centerline and the top line on the main view. Type <N> in order to snap the text to the node at the intersection. Move the cursor to the text placement point and press ![]() . The text editor window appears on screen. Type a line of text “Sample Plate Drawing” and push [OK] button.
. The text editor window appears on screen. Type a line of text “Sample Plate Drawing” and push [OK] button.
Should the text not be placed as intended, this can be corrected easily. Quit the text creation command. Point and click ![]()
![]() at the text. This automatically starts the editing command Edit Text. The selected text starts moving after the cursor. Locate it as necessary and click
at the text. This automatically starts the editing command Edit Text. The selected text starts moving after the cursor. Locate it as necessary and click ![]() .
.
To explicitly call the text editing command, use
Icon |
Ribbon |
|---|---|
|
- |
Keyboard |
Textual Menu |
<ET> |
Edit > Draw > Text |
In this case, select the text to be edited after launching the command.
There is another way of creating a text, which is typing it directly in the drawing area. To do so, enter the “Create Text” command and set the option <Т> - “Create paragraph text” (icon ![]() ). Move the cursor to the intended location of the text and press left click. A rectangle starts rubberbanding on screen that defines the text box. Define the intended area and click
). Move the cursor to the intended location of the text and press left click. A rectangle starts rubberbanding on screen that defines the text box. Define the intended area and click ![]() , then push the
, then push the ![]() icon. A blinking cursor will appear in the box. Make sure of the correct input locale and enter the intended text. Then push the
icon. A blinking cursor will appear in the box. Make sure of the correct input locale and enter the intended text. Then push the ![]() icon or <F5> key.
icon or <F5> key.
The drawing is now finished. One can try moving construction lines using construction editing command. When editing, fix line new placement by either using ![]() or specifying exact line location in the parameters window or parameters dialog (the latter accessible via the
or specifying exact line location in the parameters window or parameters dialog (the latter accessible via the ![]() pick). Note that the whole drawing, including dimensions, adequately responds to modifications. Changing diameters of the conical hole instantly reflects on the two other views. Hatches also adjust to their defining contours. Now one can easily witness the powerful capabilities brought in by the parametric technology.
pick). Note that the whole drawing, including dimensions, adequately responds to modifications. Changing diameters of the conical hole instantly reflects on the two other views. Hatches also adjust to their defining contours. Now one can easily witness the powerful capabilities brought in by the parametric technology.
From now, we will assign variables and expressions to the various drawing elements. Select the left-hand-side line on the main view by clicking ![]() .
.
The line will get highlighted, along with the one it is dependent on by construction. Line editing command will automatically activate as well. The two parameters are displayed in the parameters window. The first one is the original distance, and the second is the current value according to the cursor position.

Since the line was originally created as parallel to the left-hand side of the plate, the displayed distance is the distance between the right and the left-hand side of the plate. Instead of a specific value, one can input a variable. Type a variable name “w” instead of the value and press <Enter> or [OK].
A new dialog window will appear requesting a confirmation for the new variable to be created.
Please note that the variable naming is case-sensitive. A variable “w” is not the same as “W”.
The created variable «w» and the value assigned for this variable can be seen in the window “Variables” located, by default, under the parameters window. Point with a cursor at the number in the column “Expression”, press ![]() to enter the edit mode and specify the value for the variable, for example, «170». The line will move to a different location corresponding to the new value of the plate width.
to enter the edit mode and specify the value for the variable, for example, «170». The line will move to a different location corresponding to the new value of the plate width.
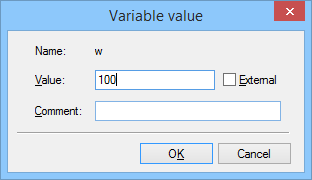
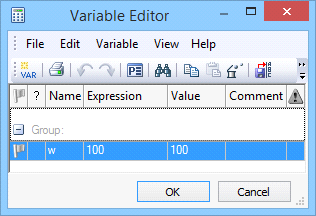
The same operations can be carried out in the dialog window of the command Edit Variables:
Icon |
Ribbon |
|---|---|
|
Title Block > Additional > Variables |
Keyboard |
Textual Menu |
<V> |
Parameters > Variables |
Similarly, define a variable “H” as the distance from the base line to the top side of the main view. Select the line on the drawing by clicking ![]() and enter the variable name in the parameters window. Now there will be already two variables in the window “Variables”, and you can, by modifying their values, observe the change in the drawing.
and enter the variable name in the parameters window. Now there will be already two variables in the window “Variables”, and you can, by modifying their values, observe the change in the drawing.
Try making an expression. In the window “Variables” place the cursor in the field “Expression” of the variable «H» and press ![]() to enter the edit mode. Specify the expression «w/2» instead of the numerical value. This means that the value of “H” will be equal to the half of “w”. From now on, changing just the value of “w” will automatically reflect on the value of “H”.
to enter the edit mode. Specify the expression «w/2» instead of the numerical value. This means that the value of “H” will be equal to the half of “w”. From now on, changing just the value of “w” will automatically reflect on the value of “H”.
Next, let’s assign an “R” variable to the radius of the circle defining the fillet at the upper-right corner of the plate. Select the circle on the drawing by ![]() . In the parameters window specify the radius as “R” variable. After confirming its creation, in the window “Variables” set the variable to the following expression: w < 100 ? 0 : 6
. In the parameters window specify the radius as “R” variable. After confirming its creation, in the window “Variables” set the variable to the following expression: w < 100 ? 0 : 6
This expression means that “R” equals 0 when “w” is less than 100, and equals 6 otherwise.
Let’s briefly explain the syntax of the expression. Its members are described as follows.
< - is the “less than” sign
? - means “then”, “in such a case”
: - means “else”, “otherwise”
The complete expression is written as
R = w < 100 ? 0 : 6
The value of “R” equals 0, if “w” < 100, and equals 6 for any other value of “w”. Therefore, there are only two possible values of “R” - either “0” or “6”.
Check this on your drawing. Try setting “w” values greater or less than 100, and watch what’s happening. Note that when the radius of the fillet equals 0, then the radial dimension automatically disappears. The system does it for the user.
Therefore, one can create a variety of relations between variables, including quite complex ones, using just a few basic terms. You will get to know all capabilities of the variables functionality in later chapters.