Edit Picture |
  
|
Calling the command:
Icon |
Ribbon |
|---|---|
|
- |
Keyboard |
Textual Menu |
<EP> |
Edit > Construct > Picture |
The Edit Picture command allows you to edit pictures.
Upon calling the command, the following options become available in the automenu:
|
<*> |
Select all elements |
|
<R> |
Select element from list |
|
<Esc> |
Exit command |
To select a picture, point to its image and click ![]() . Selection of several pictures can be carried out via a window or with the help of the key combination left <Shift>+
. Selection of several pictures can be carried out via a window or with the help of the key combination left <Shift>+![]() (adding elements to a list of chosen ones) or left <Ctrl>+
(adding elements to a list of chosen ones) or left <Ctrl>+![]() (removing an element from the list). After selecting one or more pictures, the following icons become available:
(removing an element from the list). After selecting one or more pictures, the following icons become available:
|
<P> |
Set Picture Parameters |
|
<I> |
|
|
- |
Picture Fixing Point |
|
<Del> |
Delete selected element(s) |
|
<Esc> |
Cancel selection |
Editing Single Picture
If a single picture is selected, it becomes outlined. The appropriate characteristic points and markers will be highlighted with the outline, depending on the fixing mode.
Editing Picture Inserted by Two Fixing Points
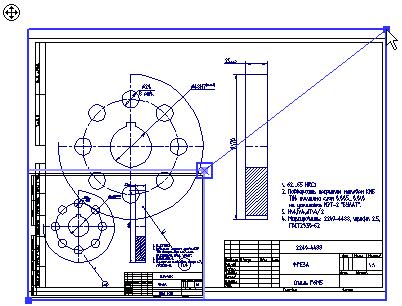
If the picture was put on the drawing using two fixing points, then the points defining the picture position on the drawing will be highlighted. By modifying the fixing point positions, you can change the picture location and size. Moreover, at the upper left corner of the picture there will be a picture movement marker, with the help of which a movement of a whole picture can be performed.
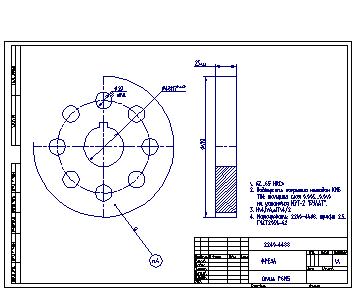
To modify the picture size, move the mouse to the necessary fixing point and click ![]() . The picture's outline will start rubberband. One of the corners of the outline will be "tied" to the pointer, while the other stay still. Next, move the pointer to the necessary position and click
. The picture's outline will start rubberband. One of the corners of the outline will be "tied" to the pointer, while the other stay still. Next, move the pointer to the necessary position and click ![]() . After that, the picture will redraw per its new sizes. If the selected fixing point was fixed to a node, this fixing will be broken after the move.
. After that, the picture will redraw per its new sizes. If the selected fixing point was fixed to a node, this fixing will be broken after the move.
Upon movement of the fixing point, the following option will be available in the automenu:
|
<N> |
Set Relation with Node |


To move the picture with the help of the movement marker, it is necessary to bring the cursor to the pointer, press ![]() , drag the cursor to the necessary location and press
, drag the cursor to the necessary location and press ![]() again. If the fixing points were initially fixed to nodes, then, upon moving the picture, their relations with those nodes will be broken.
again. If the fixing points were initially fixed to nodes, then, upon moving the picture, their relations with those nodes will be broken.
The picture’s rotation angle can also be defined in the two-fixing-points mode in the parameters window.
Editing Picture Inserted by One Fixing Point, Angle and Scale
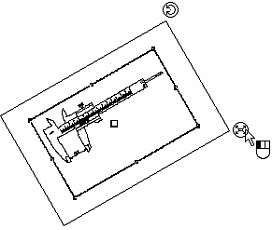
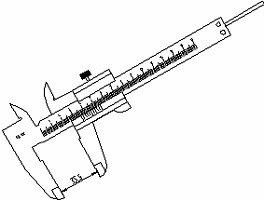
In case when selected picture was put on the drawing with the help of one fixing point, angle and scale, the fixing point as well as the markers for setting picture's movement, scale and angle of rotation will be highlighted. The markers enable to change position, angle of rotation and size of the image directly on the drawing.
The location of the fixing point will be determined by the value of the parameter Fixing Point in the command's parameters window (or using ![]() command). If this parameter is modified, another fixing point will be highlighted on the drawing (corresponding to the selected value of the parameter).
command). If this parameter is modified, another fixing point will be highlighted on the drawing (corresponding to the selected value of the parameter).
Detailed description of working with markers was provided in the chapter Drawing Views.


The exact numerical values of the rotation angle and picture scale can be defined in the picture's parameters dialog box (the option ). The same dialog allows modifying the picture's fixing method.
If multiple pictures are selected, you can modify their parameters (level, layer, priority). You can also delete the selected pictures from the drawing.
Editing Several Pictures
If multiple pictures are selected, you can modify their parameters (level, layer, priority). You can also delete the selected pictures from the drawing.
Updating Internal Pictures
If upon creating a picture in the command's dialog box the flag Create Internal Document was turned on, then such picture will be connected with two links: the first link will refer to the external source file of the picture, the second one – to, created upon insertion, the internal (i.e. stored inside the current document) copy of the file. Upon recalculations, an internal copy of the source file will be used for updating the picture. This means that picture will preserve the form which the source document had at the moment of creating a picture.
For updating the picture from the external file, it is necessary to select a necessary picture in the command waiting mode and call the context menu with the help of ![]() . For the internal picture, which maintained connection with the external source file, the command Update File Data will be accessible from the context menu.
. For the internal picture, which maintained connection with the external source file, the command Update File Data will be accessible from the context menu.