Selecting Vertices for Blending |
  
|
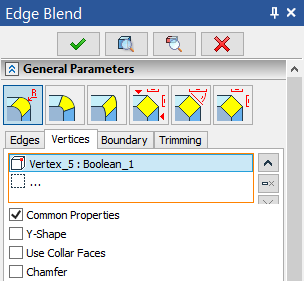
To select a vertex, upon calling the Edge Blend command, go to the Vertices tab of the General Parameters section of the Parameters window, or use the following automenu option:
|
<Z> |
Allow vertex selection without edge selection |
 .
.
This automenu option and the Vertices tab are linked together: activation of the tab activates the automenu option and vice versa. This mode enables filter for selecting points on the Filter Toolbar. Then you can select a vertex in the 3D scene by moving mouse cursor over it and clicking ![]() . Selected vertex will be displayed in the list. Vertices added to the list are highlighted in green in the 3D scene, current selection is highlighted in red.
. Selected vertex will be displayed in the list. Vertices added to the list are highlighted in green in the 3D scene, current selection is highlighted in red.
Buttons allowing to ![]() Collapse the list,
Collapse the list, ![]() Delete Element from the List or
Delete Element from the List or ![]() Clear the list are located to the right side of the list. Click
Clear the list are located to the right side of the list. Click ![]() on element in the list to select it. Selected element will be highlighted in the list.
on element in the list to select it. Selected element will be highlighted in the list.
Each row of the list contain an element type icon (vertex), a name of an element and a name of a parent body.
Vertex blend options checkboxes are located below the list.
The Common Properties checkbox (enabled by default) applies same condition of Y-Shape, Use Collar Faces and Chamfer checkboxes as well as selected Edge Processing Order to all elements in the list. Disabling Common Properties for selected element allows to define its parameters independently.