2D Constructs Replacement |
  
|
The command can be called in one of the following ways:
Icon |
Ribbon |
|---|---|
|
Edit > Edit > Replace Workplane > Additional > Replace |
Keyboard |
Textual Menu |
<RL>, <Ctrl>+<H> |
Edit > Replace |
The command allows replacing a construction element by an element of the same type. That is, replacing all references to the original element in the model by references to another construction element. If necessary, the original element can be automatically deleted from the model upon the replacement or kept.
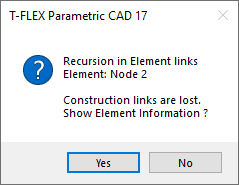
First, you have to select a source element to be replaced. Select ![]() a node or construction line (straight, circle, spline, etc.). Selected element will be highlighted. Next, select a target element, which will replace the source element. When selecting a target element, only elements of the same type as the source one will be selectable. Upon replacement, all elements constructed in relation to the source element will be regenerated in relation to the target element. If you try to select a child of the source element as the target, the system will throw a recursion error and the replacement won't be possible.
a node or construction line (straight, circle, spline, etc.). Selected element will be highlighted. Next, select a target element, which will replace the source element. When selecting a target element, only elements of the same type as the source one will be selectable. Upon replacement, all elements constructed in relation to the source element will be regenerated in relation to the target element. If you try to select a child of the source element as the target, the system will throw a recursion error and the replacement won't be possible.

Upon calling the command, the following options become available in the automenu:
|
<L> |
Select Line |
|
<C> |
Select Circle |
|
<E> |
Select Ellipse |
|
<S> |
Select Spline |
|
<N> |
Select Node |
|
<I> |
Select Other Element |
|
<Del> |
Delete Source Element After Replacement |
|
<Esc> |
Exit command |
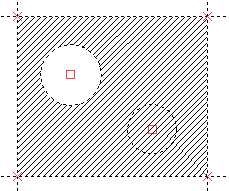
Let's review the use of the command on a simple example. The circle located in the upper left part of the picture is used as the inner contour of the hatch.

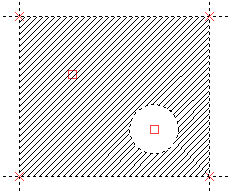
Let's replace this circle by another circle located in the bottom right part of the picture using the replace command. Upon replacing the second circle becomes the inner contour of the hatch, while the first circle gets deleted.
