Hole Attachment Point |
  
|
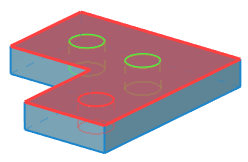
To specify position of holes being created, specify an attachment point for each hole, one at a time. One hole is associated with one point. The base face of each hole is defined by the system automatically. By default, the axes of the holes are normal to the respective base faces.
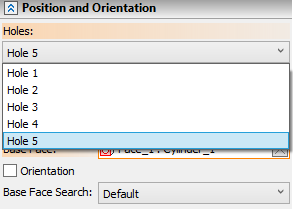
After specifying an attachment point, the current hole is added to the Holes drop-down list on the Position and Orientation tab.
Attachment points of the holes can be defined by one of the following 3D elements.
Face of a body. The specified face becomes the base face of the hole; the hole center will be positioned in the location of the mouse click that selected the face. For the current hole, it will be possible to adjust the U and V coordinates, as well as set the offset from the first or second edge.
3D node which is either on the face of the body or outside of it.
•If the 3D node is on the face, this edge is chosen as the bearing one, the hole center coincides with the given node.
•If the 3D node is outside of the face, it is necessary to choose a body (or several ones), then the 3D node. The hole is built normal to the closest body face. If it is required to build the hole otherwise, the direction should be given. If the system cannot calculate the hole depth, a corresponding notice will be given.
Circular edge on one of the body faces. The face with the plane of the chosen circular edge will be chosen as the bearing one; the hole center is associated with the circular edge circumference center.
The hole edge. The circular hole edge locates the center and the bearing edge of the hole for given depth from the template.
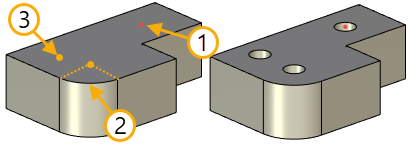
1. 3D Node
2. Circular edge
3. Face
To quickly define a set of holes, you can select an array of 3D nodes for the attachment points. Holes will be automatically created at each 3D node of the array.

3D nodes - hole array elements
Changing the attachment point
The attachment point of any hole in a set can be modified by one of the following means:
1. Define a totally new attachment point (new base face or new attachment 3D element for the hole center);
2. Modify the hole position on the current face (maintaining same base face) – by defining offsets of the hole center from the two side edges of the base face. The hole center will be attached to the point on the base face, defined by the specified offsets.
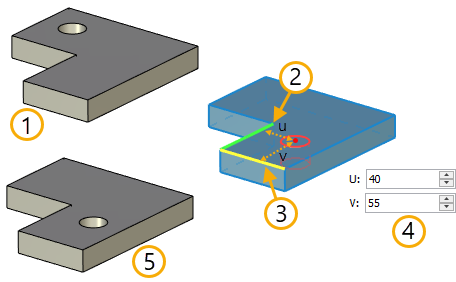
1. Source hole position
2. First edge
3. Second edge
4. Setting offsets from the first edge by U and from the second by V
5. New hole position
3. Create coaxial hole with automatic adjustment of the hole position on the base face (see the Coaxial holes section).
Defining attachment points of holes
Hole attachment points can be defined upon activating the automenu option (the option is active by default upon entering the command):
|
<A> |
Enter Hole center |
With the option active, simply select the desired face, 3D node or a circular edge on a face in the 3D window. The parent body of the selected element is highlighted, and a wireframe preview of the hole being created is displayed.
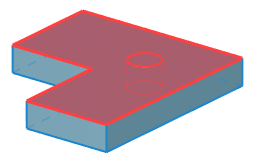
After defining the attachment point for the first hole, the option ![]() stays active. This helps creating a set of holes without additional actions. Just keep picking attachment points after selecting the first one. As a result of defining a number of attachment points, a preview of a set of holes is displayed in the 3D scene. The type and geometrical parameters of all elements are the same.
stays active. This helps creating a set of holes without additional actions. Just keep picking attachment points after selecting the first one. As a result of defining a number of attachment points, a preview of a set of holes is displayed in the 3D scene. The type and geometrical parameters of all elements are the same.
Creation of a set of holes from an array of 3D nodes is done with the option:
|
<M> |
Add Hole Array |
Upon activating the option, specify the source array of nodes. You can select an array either in the 3D model tree or directly in the 3D scene by clicking any array element with ![]() .
.
When you create a holes array, you need to set maximum number of the array elements. If this rule is not met, offset or disappearance of new holes in array can occur after the holes number increase.