Defining Source LCS of 3D Transformations |
  
|
You can enter the defining source LCS mode of the Transformations command using the following automenu option:
|
<S> |
Select or Create Source LCS |
3D scene in this mode contains transformed element and coordinate system existing in the model only.
You can either select an existing LCS by moving the mouse cursor over it and clicking![]() , or define a new LCS using following automenu options:
, or define a new LCS using following automenu options:
|
<1> |
Select 3D Node or vertex as LCS origin |
|
<2> |
Select point that defines direction of X axis |
|
<3> |
Select point that defines direction of Y axis |
Activating these options enables filters for selecting elements, which can define a point, on the Filters Toolbar.
Besides, activation of ![]() and
and ![]() options also enables filters for selecting elements, which can define a direction.
options also enables filters for selecting elements, which can define a direction.
When selecting elements, pay attention to active filters..
An LCS defined using options mentioned above or selected from the existing ones can be edited using manipulators and following options:
|
<A> |
Rotate LCS around X axis by 90° |
|
<O> |
Rotate LCS around Y axis by 90° |
|
<Z> |
Rotate LCS around Z axis by 90° |
|
<8> |
Change LCS axes orientation |
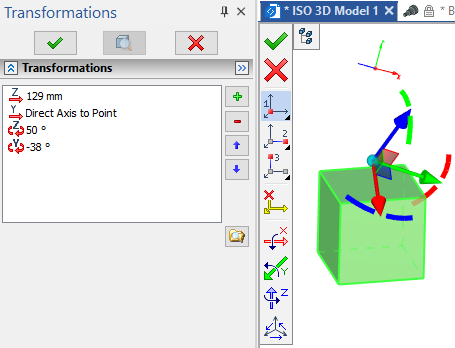
The Parameters window in the defining source LCS mode contains the Transformations tab only, which displays all transformations applied to LCS.
The Transformations tab, as well as manipulators work in this mode in the same way as in the default Transformations command mode. The only difference is that here transformations are applied to a source LCS of a 3D element and not to an element itself.

The following automenu option allows to reset the source LCS defining mode to its initial state:
|
<C> |
Reset Target LCS |
The following automenu option allows to exit the source LCS defining mode and return to the Transformations command without applying LCS changes:
|
<X> |
Exit command |
The following automenu option allows to exit the source LCS defining mode and return to the Transformations command with applying LCS changes:
|
<Ctrl+Enter> |
Finish input |