Tool Windows Management |
  
|
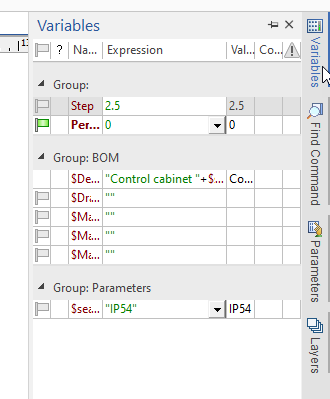
System tool windows can be positioned in the main application window in various ways. Those can be docked at the side of the working window, made hideable or set to floating mode. To save the workspace, some windows can be joined in one group window. Unused tool window can be turned off.


State of a tool window can be controlled via the the contextual menu invoked by clicking ![]() on a header. Following commands are available for all types of tool windows:
on a header. Following commands are available for all types of tool windows:
•Hide. Remove the window from the screen.
•Set floating. Turn off the snapping of a tool window to borders of a main window.
•Auto Hide. Turn on/off the auto hide mode for the window.
•Show Tab Captions. This option is enabled by default. If you disable it, when using grouped tool windows, then in the default mode tab name will be displayed for the current window only, in the auto-hiding mode tab name won’t be displayed for any of the windows.
Additional option is available for the Parameters window:
•Show window automatically. If it's enabled, the Parameters window becomes active automatically upon launching any command that requires parameters input.
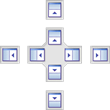
Click ![]() on a tool window's header and drag the mouse to change window's position. When moving the window snapping icons appear on the screen. Icons represent possible position of the tool window, in relation to borders of the main window. Drag a tool window onto the desired snapping icon to apply this snapping.
on a tool window's header and drag the mouse to change window's position. When moving the window snapping icons appear on the screen. Icons represent possible position of the tool window, in relation to borders of the main window. Drag a tool window onto the desired snapping icon to apply this snapping.

Snapping icons can be disabled by holding <Ctrl> while dragging a window.
Tool windows can be combined into a single group with tabs. It saves the screen space. Drag ![]() one window onto the header of another window. The preview of new window's position appears. Release the
one window onto the header of another window. The preview of new window's position appears. Release the ![]() to apply the grouping.
to apply the grouping.

The same result can be achieved by dragging a window onto the middle area of another window and releasing the ![]() on the central snapping icon (the one that represents tabs).
on the central snapping icon (the one that represents tabs).

Navigation between grouped windows is performed via clicking their tabs.

The system switches windows automatically in some cases.
You can also drag one of the grouped windows by its header to remove it from the group.
If you need more free working space in the main window, you can enable auto hiding of tool windows. Automatically hidden window becomes minimized to a tab at the border of main window. When you hover the cursor on this tab, the corresponding window will automatically appear. If you move the cursor from the window, the window will be minimized again.


Auto hiding is applicable not only to windows snapped to the main window's borders, but to floating windows as well.


To enable the auto hiding mode, click ![]() on a tool window's tab or header and enable the Auto Hide checkbox. You can also use the
on a tool window's tab or header and enable the Auto Hide checkbox. You can also use the ![]() button located in the header of tool window. Upon enabling auto hiding the button changes icon to
button located in the header of tool window. Upon enabling auto hiding the button changes icon to ![]() .
.
To disable the auto hiding, click ![]() on a tool window's tab or header and disable the Auto Hide checkbox. Or use the
on a tool window's tab or header and disable the Auto Hide checkbox. Or use the ![]() button located in the header of tool window.
button located in the header of tool window.
Sometimes can be helpful to use the floating mode. In this mode the tool window can be located at any position on the screen without snapping to the main T-FLEX CAD window. To enable the floating mode drag a tool window by its header or by its tab (if grouped) to the desired position using ![]() . To make the whole group floating drag it by its header in a similar way.
. To make the whole group floating drag it by its header in a similar way.
You can also use the Set floating command in the contextual menu of tool window. Notice that applying this command to a grouped window excludes it from a group.
Floating mode can be disabled by dragging the window to a snapping point using ![]() .
.
