Cameras |
  
|
Cameras |
|
A camera is necessary element for visualizing three-dimensional objects, that determines the point and direction of viewing the 3D scene. Each 3D window provides a system camera installed "by default". The user can additionally create one's own cameras and make one of them active.
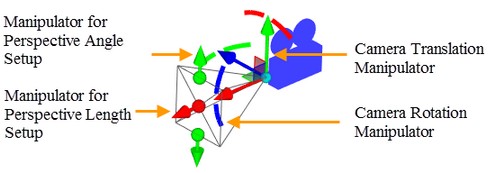
A camera has its own coordinate system and a set of manipulators. The manipulators allows you to translate the existing cameras around the 3D scene and change their viewing direction. This can be used when examining inner elements of the scene and creating animation clips.
The system camera activates upon opening a new 3D window. Initially, it is located at the distance that permits watching all elements in the 3D scene.
Creating cameras
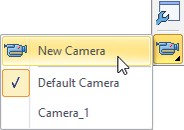
To create a camera, use the command "3CA: Construct Camera". The command is called by one of the following means:
Icon |
Ribbon |
|---|---|
|
View → 3D Model → Select Camera → New Camera |
Keyboard |
Textual Menu |
<3CA> |
Construct > Camera |
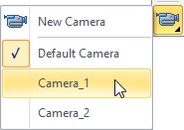
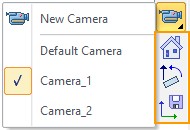
Or you can create camera using View toolbar:
The camera creation steps include:
1. Set location and direction of viewing of the camera (you can use manipulators or select one of the existing local coordinate systems.
2. Setting parameters (optional).
3. Confirming camera creation.
Defining camera
Upon calling the command, the option automatically sets in the automenu:
![]() <L> Select target LCS
<L> Select target LCS
Use this option to select a local coordinate system in the 3D view window.
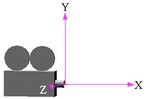
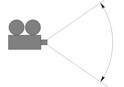
Once a coordinate system is selected in the 3D view window, a schematic image of the camera will be displayed. The initial camera direction is always along the X-axis, with the Y-axis always directed up, and the Z-axis to the right.
After that, you can set up parameters (if necessary), and then confirm the camera creation by pressing ![]() .
.
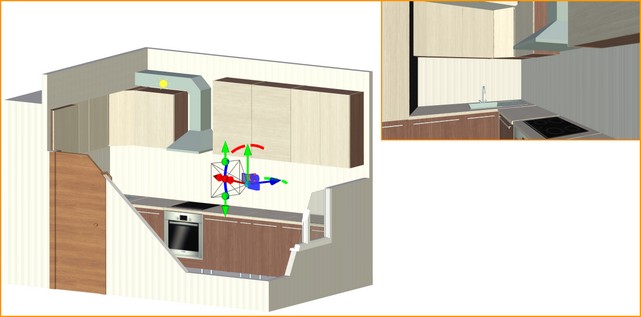
If there is no LCS existing in the scene you can specify the camera position using manipulators.
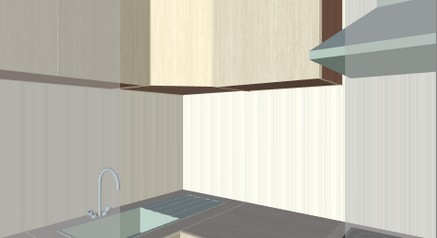
Preview window is displayed in the upper right angle of working window in camera creation mode. It shows the view from the camera in real time.
Activating camera
To activate a created camera, use the command "3VC: Select Camera":
Icon |
Ribbon |
|---|---|
|
View → 3D Model → Select Camera |
Keyboard |
Textual Menu |
<3VC> |
View > Camera |
Or you can select camera using View toolbar.
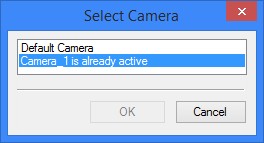
Calling this command brings up a dialog box containing a list of all cameras existing in the 3D scene. Select the camera with which the 3D scene will be viewed.
Another way of selecting the active camera is, while in the command waiting mode, moving the pointer over a 3D camera in the 3D window and right clicking ![]() , and, after that, in the coming up menu picking the item “Select”.
, and, after that, in the coming up menu picking the item “Select”.
A camera can be selected from the context menu accessed by right clicking ![]() over a blank area of the 3D window. Yet another way is to do so on the 3D model tree.
over a blank area of the 3D window. Yet another way is to do so on the 3D model tree.
Moving camera
To watch the 3D scene via a moving camera, you need to make that camera active.
Selected camera mode enables “walking” around the current 3D scene. It is especially convenient when creating floor plans of buildings.
A separate mechanism for cameras movement is used. When camera is active you can move inside designed areas, rotate camera and perform operations as usually in T-FLEX CAD.
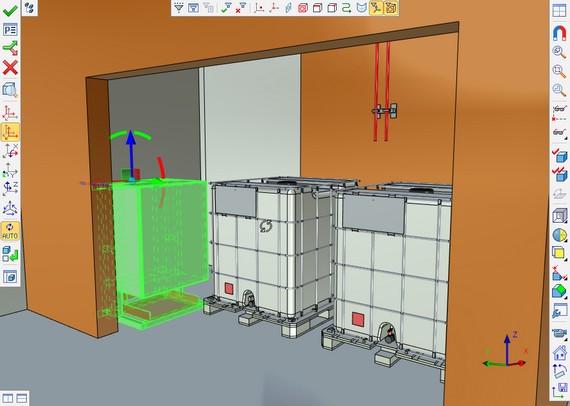
If camera is moved inside the solid body in the scene, a wireframe mode is activated for the body.
Controls in active camera mode:
Note! Controls for the perspective camera are described below. Result of the key combinations usage may differ for the parallel camera, because of the parallel projection properties.
![]() - camera rotation.
- camera rotation.
To eliminate rotation around view axis you need to activate Panorama ![]() mode.
mode.
Arrow keys allow to move camera forward/backward.
Page up/Page down keys allow to move camera up/down.
It is recommended to disable object snap ![]() on View toolbar upon movement in selected camera mode.
on View toolbar upon movement in selected camera mode.
![]() + CTRL – movement in the screen plane.
+ CTRL – movement in the screen plane.
![]() + SHIFT – zoom.
+ SHIFT – zoom.
![]() + ALT – rotation around vertical axis.
+ ALT – rotation around vertical axis.
Pressed mouse wheel + CTRL – mode of smooth move forward/backward. Movement speed changes according to the cursor position.
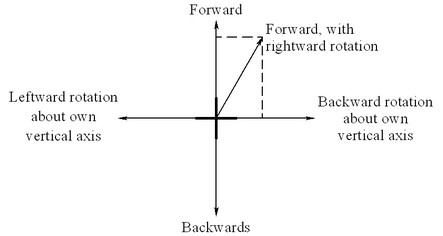
A cross will appear on the screen that will become the reference center for the direction vector (the vectors are not displayed). The motion occurs in the following way: moving the pointer by the mouse with the button depressed upward from the cross moves the camera forward. Moving the pointer downward from the cross will move the camera backwards. Moving the pointer in the horizontal direction right or left of the cross will make the camera rotate about its vertical axis right or left, accordingly. Moving the pointer along a diagonal with horizontal and vertical components (see the diagram) will make the camera both move in the respective direction and rotate. Note that, depending on the pointer's bias to one or the other main vector, the translation or else the rotation will dominate to some degree. The farther the pointer is moved away from the cross, the faster the camera will move.
Mouse wheel rotation – zoom: move the camera forward/backward.
Mouse wheel rotation + CTRL – zoom: perspective angle changed without camera movement.
Long press left mouse button (until the cross symbol appears) – orbital rotation around the selected center. The center is selected using the existing in the scene geometry.
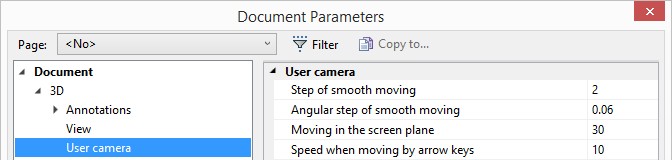
Special tab in the Document Parameters dialog is used for camera management.
Additional options for camera are available on the View toolbar after selecting camera as active.
Active Camera Options
Options available when camera is active:
Option ![]() allows to restore original/last saved position of the camera.
allows to restore original/last saved position of the camera.
Option ![]() allows to reset vertical orientation of the camera.
allows to reset vertical orientation of the camera.
This option performs a one-time action. In this way, the values of the coordinates resulting from spinning the camera and setting its vertical position reset to the original values, which are those recorded as a result of the last call of the ![]() command.
command.
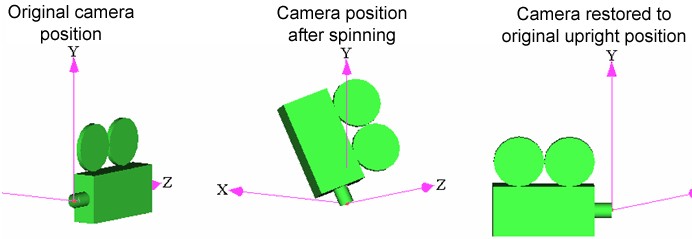
Option ![]() allows to save current position and perspective of the camera. If you didn’t activate the option after movement/rotation of the camera, the camera will return to the original position after exiting selected camera mode.
allows to save current position and perspective of the camera. If you didn’t activate the option after movement/rotation of the camera, the camera will return to the original position after exiting selected camera mode.
Camera Parameters
Parameters section:
The “Type” parameter defines the method of projecting the objects in the 3D scene when visualizing with the help of the given camera.
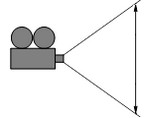
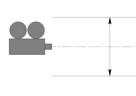
The projection can be “Orthogonal” – defining parallel mapping without respect to the distance from the viewpoint, or “Perspective” – defining perspective mapping that accounts for the distortion as the distance between the camera and the watched object grows.
External. If a model is used as a 3D fragment, then the model’s cameras with this parameter set will be also available in an assembly. The position of such camera will be defined by the position of the 3D fragment. Parameters of such camera cannot be modified in an assembly.
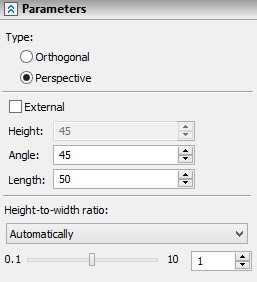
Angle. Defines the watching angle of the perspective projection. The height of the rectangle adjusts with changes in the view angle.
Height. Defines the watching height of the projection. The view angle adjusts with changes in the height.
|
|
Length. Defines distance to the projection.

Height-to-width ratio defines projection height to width ratio. You can select a value from the drop-down list or manually.
Height-to-width ratio is applied when you record explode animation.
More information about exploded view can be found in “Auxiliary Tools for 3D Assemblies Modeling” chapter.
Options section
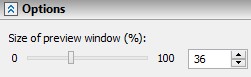
Size of preview window. Specifies size of the preview window in the scene.
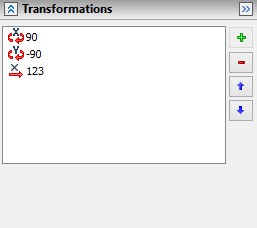
All camera translations are displayed in Transformations section.
To define additional camera parameters, call the respective dialog box. This is done by the option:
|
<P> |
Set entity parameters |
The “Visibility” group of parameters is system-wide and defines the modes of displaying cameras on the screen:
Show Image in 3D View. Setting this parameter makes the image of an existing camera visible in the 3D scene. If the parameter is not set, the camera will be hidden, but the effect of its presence remain.