Variable Editor


Variable Editor |
|
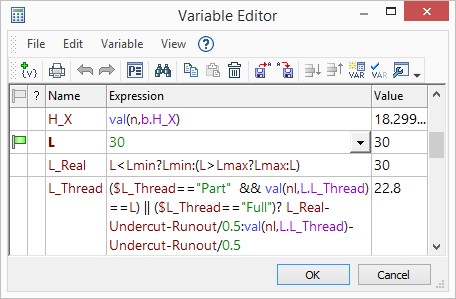
Mechanisms for working with variables have been improved, which greatly simplified the convenience of work and visual perception of information in the window.
The syntax is highlighted in different colors, which saves users from confusion and allows you to better perceive information on the screen.
The variable editor displays more information. The user does not need to stretch the window to see the entire expression.
The following features were added to the editor: highlighting the use of a variable in other expressions, a drop-down list of variables and functions, tooltips and new functions.
Innovations in Variable Editor
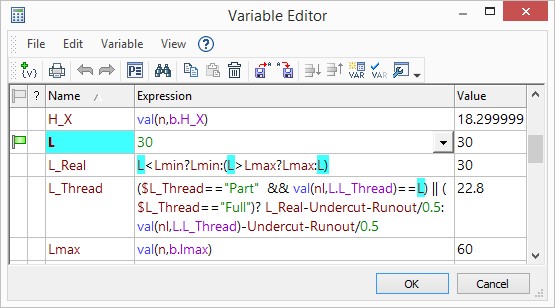
Elements of different types are now highlighted in the expressions in different colors.
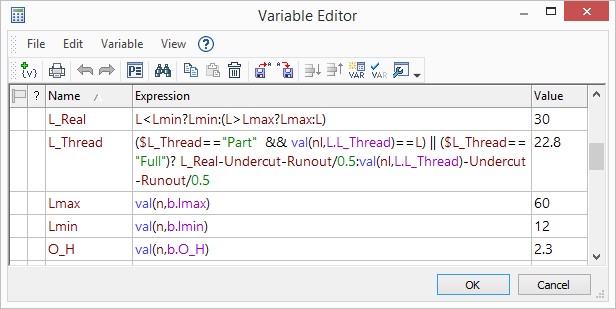
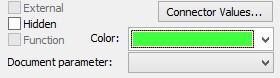
All variables specified by the user are highlighted in the expressions in a separate color. The user can manually set the color for the variable's highlighting.

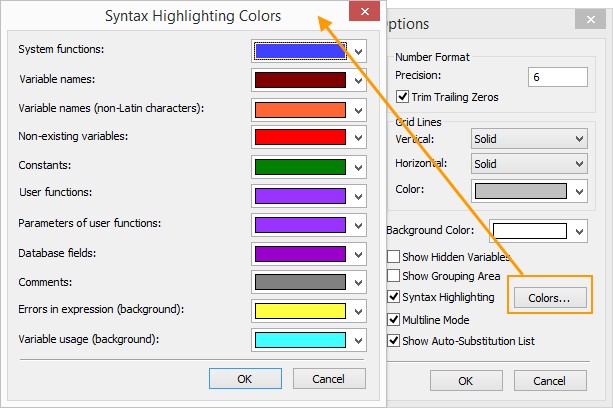
In addition, the user can change the colors for the syntax highlighting.
If there is an error in the expression syntax, the error expression will be highlighted.
![]()
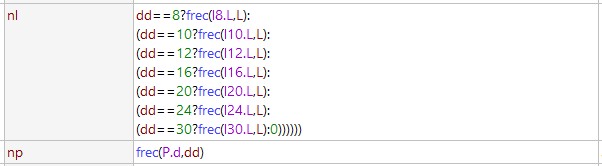
Added multi-line mode to the variable editor.
It is possible to add a line break with the combination of keys "Ctrl" + "Enter" to format the expressions in a convenient way in multi-line mode.
You can enable multi-line mode in the context menu of the variable editor.
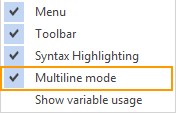
In addition, you can call the option Show variable usage in the context menu. When this option is enabled, all references to the expression will be highlighted.
Tooltips are implemented in the variable editor window.
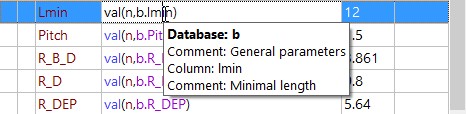
When you hover the cursor over a variable, a comment is displayed.

When you hover the cursor on the function, a brief description and an example of using the function appear.
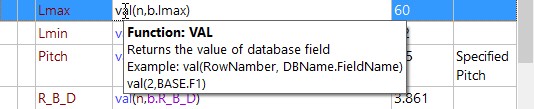
If the field belongs to a database, then the database and fields names as well as comments are displayed.
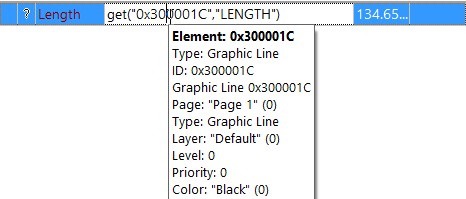
For text constants, a search for the model object by the appropriate name or identifier. If the text constant specifies the name of the object, then information about this object is displayed for it.
Tooltips are active. When you click on a tooltip, you perform an action that is different for different types of data:
●Variable name. You are moved to the variable line;
●Function name. Help with a section containing the function description is displayed;
●Access to the database field. The Database Editor window appears;
●An identifier or name of the model element. The Info dialog for this item is displayed.
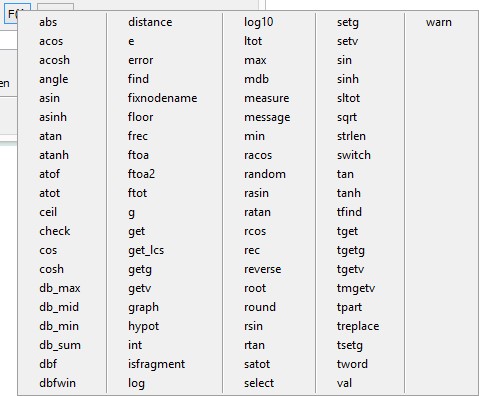
When you enter an expression, a drop-down list of suitable functions, variables, databases and database fields appears. This list contains descriptions and comments for the list items.
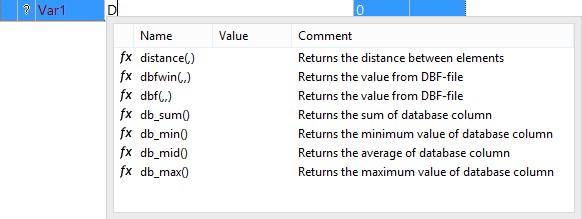
To call a list of all available variables and functions, use the combination <Ctrl> + <Space>.
When user selects a function from the drop-down list, the parentheses and delimiters necessary for the selected expression are automatically inserted.
Now users can create variables whose names are the same as the function names.
The select() function is used to select a value using several conditions.
The terms and results that will be specified when the condition is met are listed through a comma.
Select (Condition1, Result1, Condition2, Result2, ..., Result by default)
The value of the variable will be the result of the first condition met, or the default result.

In case that none of the above options are appropriate, and the default value is not set, the value of the variable will be zero.
The switch() function is used to select a value by one condition.
A result whose value corresponds to the condition will be set as a variable value.
Switch (Condition, Value 1, Result 1, Value 2, Result 2, ..., Result by default)
![]()
The root() function allows you to calculate the root of a given degree for a number.
![]()
The reverse() function allows you to reflect a string or a number in reverse order.
You can directly put any number or string in the reverse function.
![]()
You can also specify a variable whose value will be reversed.

It is important that the type of the variable corresponds to the type of value.
The random() function. Returns a random number in the specified range.

The angle() function generates a decimal angle value from degrees, minutes, seconds or from degrees and minutes. Function takes three or two parameters.
Hyperbolic functions sinh, cosh, tanh, asinh, acosh, atanh were added.
Functiong(). Returns the acceleration of gravity constant.
Functione(). Returns E constant.
Adopting Variables and Databases
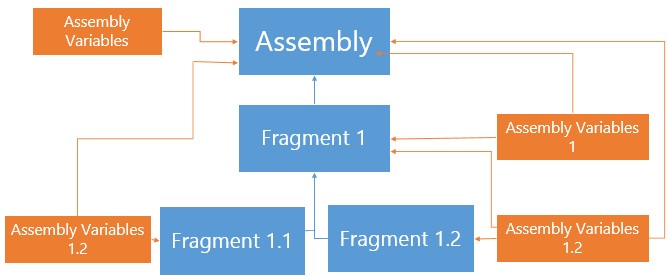
Managing the variables of large assemblies has become easier. In previous versions of T-FLEX CAD user performed several actions to copy the fragment variable to the assembly with maintaining of the link. To change this variable in the assembly and in the fragment, the user had to change the variable in the particular fragment file.
Now you can create a document in which all the variables and databases will be stored. This document should be added to all documents in which variables and databases will be used.
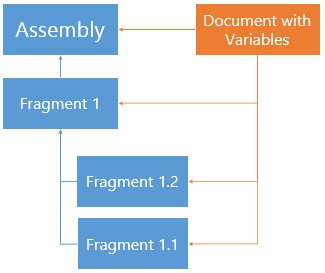
The user can then choose which variables to borrow for each file. These variables can be used as normal variable fragments to create geometry. In this case, you will need to change the variables in one single file.
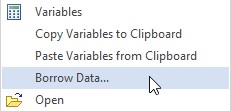
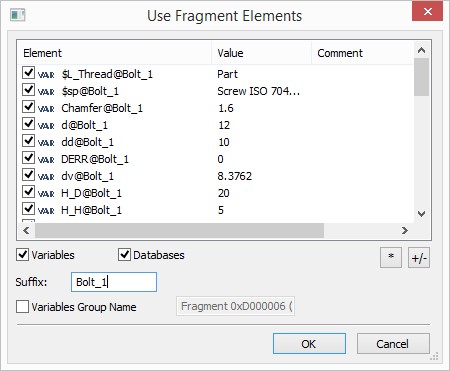
A special command is used to borrow data from the fragment.
You can specify which variables and databases will be used in the assembly in this window.
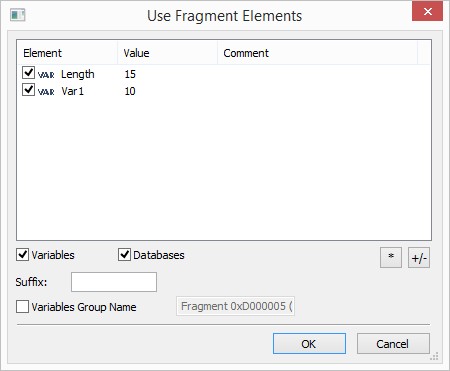
All selected variables will be added to the variable editor.

Variables can be borrowed from the same fragment with different values of external variables. For example, if the same bolt fragment is inserted in the assembly with different diameters and lengths.
For such borrowing, you need to specify a suffix when borrowing variables from a fragment. This suffix will be added to all borrowed variables after the "@" symbol.
Using the Open source document option you can open a fragment from which the variable was borrowed.
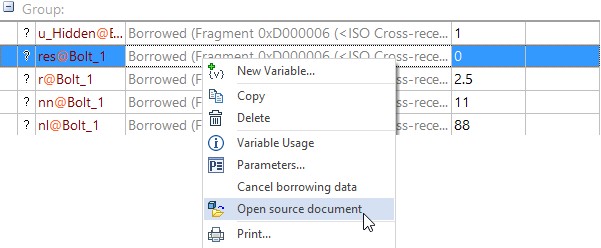
If you call the Cancel borrowing data option, you can break the link of the variable with the source document. In this case, the variable will become a normal assembly variable.
Using Variables in Enter Angle Dialog
The ability to use variables was added in the dialog for entering the angle for the value fields.
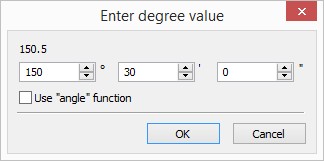
If the use "angle" function is set, the entered values are not used as a constant, but are converted to a function call. In the example above, the resulting string is "angle (A1, A2)".
The Insert variable dialog is converted to the Expression Constructor, which allows you to enter an expression using the buttons.
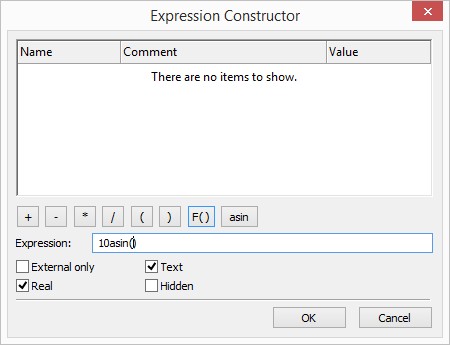
The function selection button shows a full list of functions. The selected functions will be added to the dialog.