Report by Measurement Results |
  
|
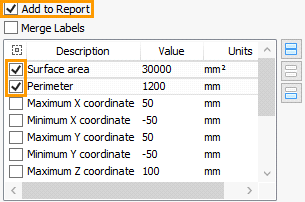
All measurement results can be output into a report. To do this, activate the Add to Report option and select in the list of measurement results those parameters, that should be included into the report. When the option is activated, a new Measurements for Report tab will appear at the bottom of the command's parameters window, allowing you to select a representation option and copy or save the report.
The measured parameters are added to the report, upon enabling their checkboxes in the special column Select Property for Report.

The enabled checkboxes are applied to all the subsequent measurements performed in a single session of the Measure command. In addition, the command stores the sets of results specified for particular types of measured elements, so when you measure elements of the same type again, the desired results are automatically added to the report. It is convenient when you need to measure several groups of the same type of elements and analyze them by the same parameters.
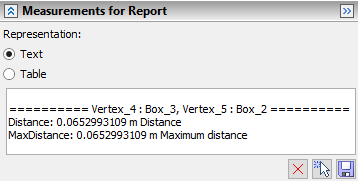
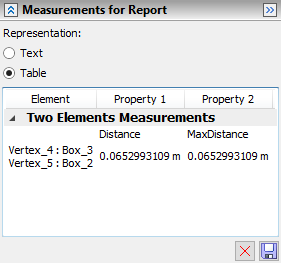
The content of the report is displayed in the Measurements for Report tab at the bottom of the command's parameters window.
The report has two representation options:
•Text
Outputs the results in rows with vertical scrolling.

•Table
Outputs the results in columns with horizontal scrolling and automatic grouping by measurement method.

Following buttons are available at the bottom of the tab:
![]() Clear
Clear
Deletes all content of the report.
![]() Select All (available for text representation only)
Select All (available for text representation only)
Selects all content of the report. Alternatively, you can select a particular section of the content using ![]() in the same way, as when selecting a content of any other text. The selected content may be copied into clipboard by pressing <Ctrl>+<C>.
in the same way, as when selecting a content of any other text. The selected content may be copied into clipboard by pressing <Ctrl>+<C>.
![]() Save
Save
Saves all content of the report into the .txt-file. The standard file selection dialog of the current operating system will appear, so you can specify the path and name of the resulting file.
See Also: