3D Fragment Supplement |
  
|
If you have two or more fragments in an assembly that have the same source file, but you want to supply the geometry of only one of these fragments, you can supply the geometry of the fragment in the assembly. It is important to change the geometry of a fragment in the assembly file without having to edit the fragment in the context of the assembly. If you go to edit a fragment in the context of an assembly, we will change the source file of the fragment, which means you will change the geometry of all fragments in the assembly that refer to the edited file.
In the case when you need to supply the geometry of only one fragment of several that have one source file – editing mode in the context of the assembly is not suitable.
Using the 3D geometry build commands, you need to modify the fragment in the assembly file, and then re-insert the modified fragment into the assembly using the Detail > Create command with the Create Fragment option (or the Create Adaptive Fragment option if you want to place possible reference elements in the geometric parameters of the fragment).
Creation of Body on the Basis of Fragment
In an assembly, you can apply all available operations to the fragment geometry. In this case, a new body is created in the assembly, the construction tree of which will include a fragment. The resulting body can be saved to a separate file and automatically inserted as a fragment.
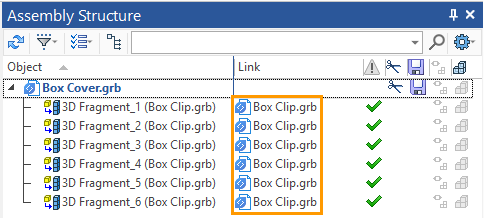
Considered an example. In the "Box Cover" assembly, there are six identical fragments Box Clip, having one source file "Box Clip.grb".
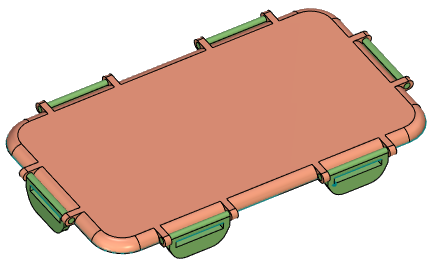
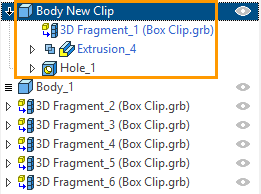
Modify the geometry of one of the Box Clip: Make one Clip longer than the Box and add a hole with the help of 3D modeling commands. As a result, a new body appeared in the assembly. The edited fragment is included into the model tree.
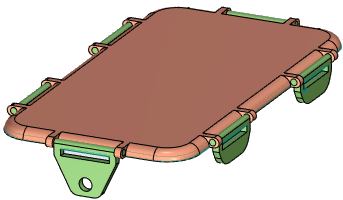
Now re-insert the modified fragment into the assembly. Call the context menu for the created body fragment and choose the Detail > Create command.
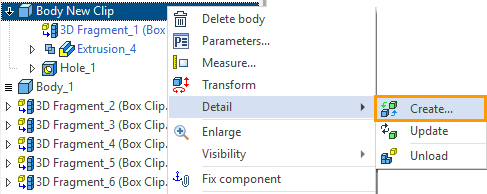
The system will ask about the option to save the fragment file.
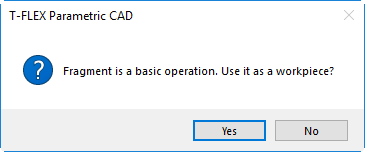
If you apply, and use the fragment as a workpiece – then operations performed in the assembly will be added to the model tree of the fragment file (inside the new fragment file you will get the model tree with new operations done in the assembly file). If necessary, reference elements are automatically created. If the answer is negative, then the model tree from the assembly will be moved to a new body file: the model tree of the created fragment file contains the fragment that was edited in the assembly.
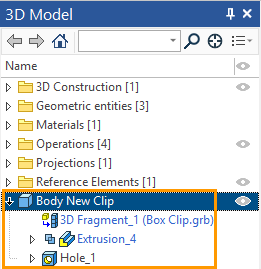
Lets transfer the operations made for the fragment in the assembly-to the fragment model tree (answer yes).
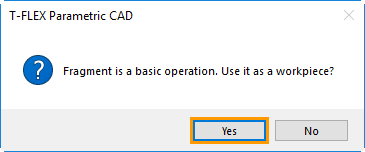
In the appeared detail creation dialog specify Create Fragment and enter its Description.

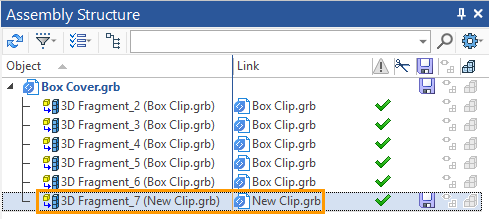
As a result of the command execution, a new fragment was created and automatically added to the assembly. In the Assembly Structure window you can see that instead of the old one, there is a new clip fragment with the original file "New Clip.grb".
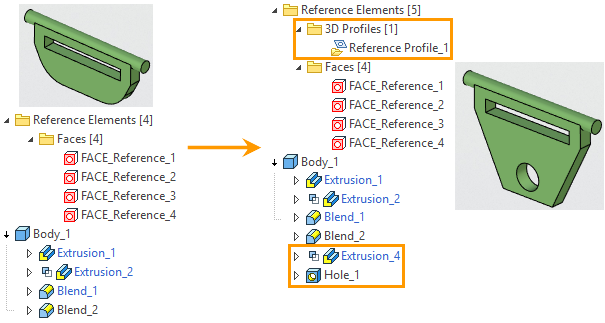
Operations performed in the assembly were added to the model tree of the new fragment. Also, the fragment has new, automatically created, reference elements. Reference elements were created for those parent elements of operations from the assembly that cannot be transferred from the fragment assembly (for more information about automatically created reference elements, see the Reference element section).
You can rework the fragment in the assembly in a special mode: 3D fragment supply mode ![]() option . This option is available in the automenu of commands, which can be applied to the fragment: Hole, Blend, Boolean (the first operand must be an editable fragment), Rib, Cut, Face Taper, Apply material, Simplify, Deformation.
option . This option is available in the automenu of commands, which can be applied to the fragment: Hole, Blend, Boolean (the first operand must be an editable fragment), Rib, Cut, Face Taper, Apply material, Simplify, Deformation.
The3D fragment supplement mode option allows you to avoid creation of the bodies in the assembly on the basis of fragments. Starting from the 16th version of T-FLEX CAD there is an opportunity to create a fragment based on the body in the assembly, with saving a fragment of the whole constructions tree in the file (command Detail > Create). So that this option can be considered outdated.
For stable operation of the system, it is not recommended to mix the two ways of the fragments reworking: standard editing of a fragment in the assembly and editing using 3D fragment supplement mode mode.
As in the previous case, after rework, the fragment can be re-inserted into the assembly. This is necessary if you want to create a new source file of the fragment that contains the changes made to the assembly in the mode of the 3D fragment supplement mode option. To do this, use the command Detail > Create with the option Create Fragment.
Consider the example of the Box Cover assembly. Add a hole to one of the Box Clip fragments. Call the Hole command. Select a face on the Box Clip fragment.
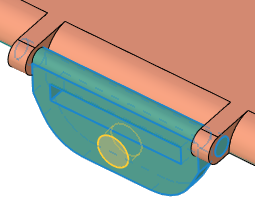
Once the system has determined that the command is being executed for a fragment, the <Num0> 3D fragment supply mode option ![]() icon appears in the command automenu (at the bottom). Let's make this option active. Enter the desired hole diameter and finish typing using
icon appears in the command automenu (at the bottom). Let's make this option active. Enter the desired hole diameter and finish typing using ![]() or <Ctrl+Enter>. A hole appeared in the fragment. In the 3D Model window of the assembly, you can see that unlike in the previous case (the 3D fragment supply mode option variant), a body based on a fragment was not created. But a folder (Supplement) will appear in the edited fragment. It contains information about the operations made in the rework mode.
or <Ctrl+Enter>. A hole appeared in the fragment. In the 3D Model window of the assembly, you can see that unlike in the previous case (the 3D fragment supply mode option variant), a body based on a fragment was not created. But a folder (Supplement) will appear in the edited fragment. It contains information about the operations made in the rework mode.
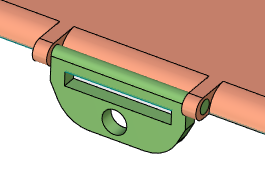
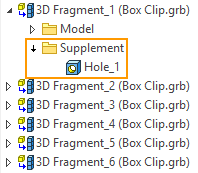
You can save the supplemented fragment to a separate file and automatically move it to the assembly. Call the context menu for the modified fragment and choose the command Detail > Create. By analogy with the previous case, specify the Create Fragment option in the dialog and enter the name "Clip with Hole".

In contrast to the previous version of the fragment supplement, the system will not ask about the use of the fragment as a workpiece, because the body was not created in the assembly, and the fragment will be saved in a new file with the model tree. The operations made in the assembly will be added to the model tree in the mode of 3D fragment supplement mode option.
As a result of the command execution, a new fragment was created and automatically added to the assembly. In the Assembly Structure window you can see that a new fragment of Box Clip with the original file "Clip with Hole" will appear instead of the old.
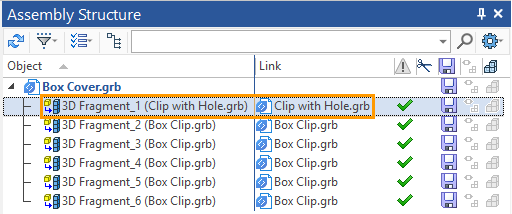
In the 3D Model window of the fragment, you can see that the hole created in the assembly is added to the chain of the body model tree.
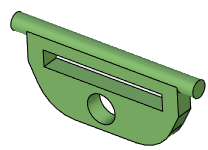
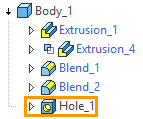
The 3D fragment supplement mode option, followed by the fragment creation, allows you to achieve the same final result as saving the body from the assembly (created on the basis of the fragment) with the indication to use the fragment as a workpiece (the first method of supplement described above). The 3D fragment supplement mode option requires the user to be careful. it is necessary to specify this option when executing the command, in addition, the possibility of the 3D fragment supplement mode option is slightly less than the supplement of the fragment with the creation of a new body in the assembly. Therefore, using the 3D fragment supplement mode option when editing fragments in an assembly is less preferable.
It should be remembered that any revision of a fragment in the assembly file is justified only when there are several fragments with one source file in the assembly, and one of the fragments needs to be changed. In all other cases, you should edit the fragment in the context of the assembly or simply edit the source fragment file.