New Mechanism for Remarks |
  
|
The development of 3D model remark mechanisms is a transition to a new way of working with design documentation without drawing design and extra papers. The designer can indicate all technical requirements and comments directly on the 3D model, and then pass it to the executive or for revision. For the convenience of managing extended remarks, a special window for working with comments has been developed. Comments can be created using the remarks tool: dimensions, labels, texts, etc. You can use a spline drawing to simulate a handwritten label.
"Remarks" Window
To work with remarks: create, delete, and edit notes, you need to use a special Remarks window.
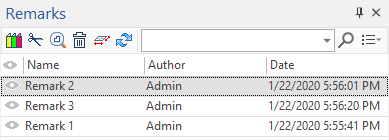
A set of icons at the top of the window enables you to manage comments.
|
New Remark |
|
Edit |
|
Show |
|
Delete |
|
Create Remark Plane |
|
Update |
The window enables you to search for and configure the displayed columns.
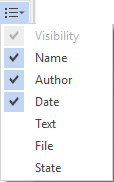
Visibility. The first column of the window is always available. Click the icon ![]() to determine the visibility of the remark in a 3D scene or drawing.
to determine the visibility of the remark in a 3D scene or drawing.
Name. Name of comment.
Autor. Author of comment.
Date. Date of comment creation.
Text. A remark object is a graphical object, so it is sometimes convenient to explain it with text.
File. Specifies the location and name of the file containing the remark. From the point of view of CAD system objects, a remark is an object created in a context. By default, the remark file is saved to the folder where the file to which the comments were created is located.
Creating Comments
To create a new comment, use the icon ![]() in the Remarks window. The system automatically activates the dialog for selecting the plane on which the remark will be created.
in the Remarks window. The system automatically activates the dialog for selecting the plane on which the remark will be created.
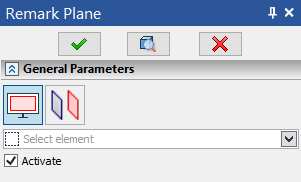
The Remarks tab automatically becomes active in Ribbon.

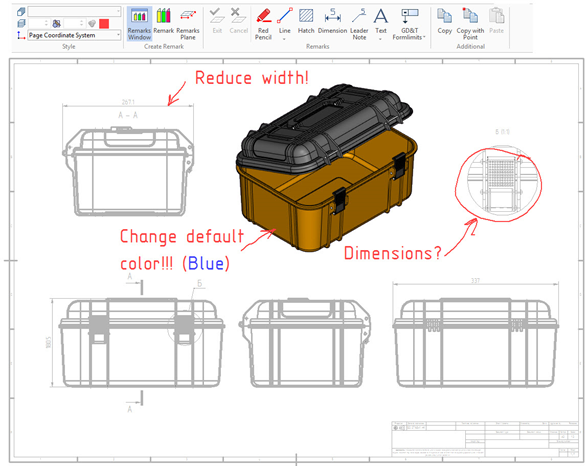
Remark and sketch tools are available on the tab. The combination of remark elements and sketch elements enables you to create a comment on a model or drawing in a free, hand-drawn style. For example, in the spline drawing mode (Red Pencil command), you can create a remark that indicates a defect in the model, on the selected remark plane.
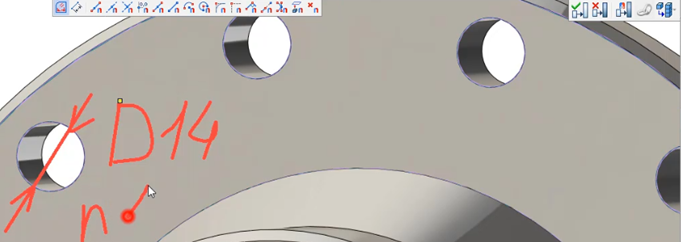
After creating a comment, you need to exit the context. As mentioned above, a comment is an object created in the context and written to a special file. To exit the context, you need to use the panel for working in context.
![]()
You can also create remarks in drawings.
Remarks in the T-FLEX DOCs Integration Mode
When working with T-FLEX DOCs data, it may be necessary to peer review system objects. For example, in the process of document correction and approval, employees may need to initiate the process of issuing remarks on the document, and the department head may give tasks to his employees to create remarks. Thus, the T-FLEX DOCs remarks management mechanism helps organize teamwork with system data in terms of their approval and peer review.
The remark management mechanism of T FLEX DOCs allows you to create remarks for system objects, as well as generate requests for creating remarks. Remarks can be created for any system objects, including T-FLEX CAD files.
Creating remarks for T-FLEX CAD files in integration mode is done through the viewing toolbar tools. You must select the object associated with the T-FLEX CAD file, or the file itself, and open the View tab on the property panel.