Sketch > Circular Arc |
  
|
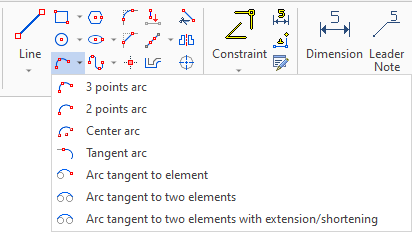
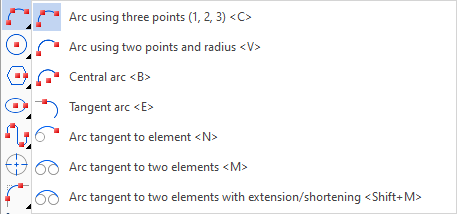
In the ribbon, as well as in the automenu of the Sketch command, options of arcs creation are grouped into a drop-down list. The presence of the drop-down list is indicated by the black triangle near an icon of an option displayed, when the list is folded. In order to unfold the list, either click ![]() a triangle
a triangle ![]() in the ribbon, or click and hold
in the ribbon, or click and hold ![]() on an icon of an option displayed, when the list is folded. This icon corresponds to an option used last in the current CAD session. When the Sketch command is launched, any option can be called via keyboard without unfolding the list.
on an icon of an option displayed, when the list is folded. This icon corresponds to an option used last in the current CAD session. When the Sketch command is launched, any option can be called via keyboard without unfolding the list.
Arc by Three Points
Icon |
Ribbon |
|---|---|
|
Draw > Sketch > 3 points arc > 3 points arc Workplane > Sketch > 3 points arc > 3 points arc |
Keyboard |
Textual Menu |
<SK>><C> |
|
Automenu of the |
|
<C> |
Arc using three points (1, 2, 3) |
The mode for creating an arc by three points is set after the option selection. The first and the third points are the end points of the arc, and the second point determines the position of the arc.
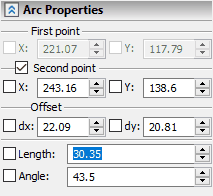
The arc can be set arbitrarily by selecting three points using the cursor, or precisely using the parameters window. In this case, the second point is given either by absolute coordinates or by offset relative to the first point of the arc. To specify the third point, you can use the absolute coordinates, radius, diameter or angle of the arc in various combinations.
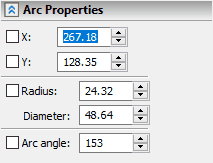
Select the Arc by Two Points and Radius
Icon |
Ribbon |
|---|---|
|
Draw > Sketch > 3 points arc > 2 points arc Workplane > Sketch > 3 points arc > 2 points arc |
Keyboard |
Textual Menu |
<SK>><V> |
|
Automenu of the |
|
<V> |
Arc using two points and radius |
You need to set two extreme points of the arc using the cursor or the parameters window. After that, the cursor will appear on the screen, dynamically displaying the position of the arc under construction, in accordance with the current position of the cursor. To fix the arc, you need to move the cursor to the necessary position and press ![]() , or enter the angle or radius (diameter) of the arc in the parameters window.
, or enter the angle or radius (diameter) of the arc in the parameters window.

Icon |
Ribbon |
|---|---|
|
Draw > Sketch > 3 points arc > Center arc Workplane > Sketch > 3 points arc > Center arc |
Keyboard |
Textual Menu |
<SK>><B> |
|
Automenu of the |
|
<B> |
Central arc |
To construct the central arc of a circle, you should specify the center of the circle, its radius (diameter), as well as the starting and ending angles of the arc. This can be done arbitrarily, using ![]() , or precisely using the parameters window. After setting the center of the circle, the dynamically moved circle will appear on the screen. In the parameters window, the fields for entering the radius (diameter) and the initial angle of the arc will become available. They can also be set by moving the cursor to the necessary point and pressing
, or precisely using the parameters window. After setting the center of the circle, the dynamically moved circle will appear on the screen. In the parameters window, the fields for entering the radius (diameter) and the initial angle of the arc will become available. They can also be set by moving the cursor to the necessary point and pressing ![]() . Next, you need to move the cursor on the fixed circle in the direction in which you want to place the arc, and press
. Next, you need to move the cursor on the fixed circle in the direction in which you want to place the arc, and press ![]() again.
again.
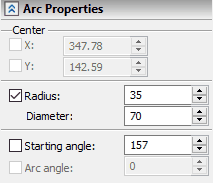
The angle of the arc can also be set in the parameters window, after which you can apply creation using the <Enter> key or clicking ![]() .
.

Icon |
Ribbon |
|---|---|
|
Draw > Sketch > 3 points arc > Tangent Arc Workplane > Sketch > 3 points arc > Tangent Arc |
Keyboard |
Textual Menu |
<SK>><E> |
|
Automenu of the |
|
<E> |
Tangent Arc |
After calling the command, you need to select a graphic line, to be continued by the tangent arc. The selected line will be highlighted. Upon selection, the preview of the resulting arc appears. It gets dynamically updated in accordance with movements of the cursor. The arc starts at the endpoint of the selected line, that was closest to the cursor at the moment of selection, and ends at the cursor position. If the continuous sketch creation is enabled, then the last created element gets automatically selected as the source for tangent arc creation - the tangent arc starts at its endpoint.
There are two possible arc configurations between the tangency point and the cursor position. By default, the system uses the configuration, that ensures smooth connection between the resulting arc and the source line at the tangency point. You can switch the configuration by pressing the <Z> key.
Set the desired position of the arc's endpoint in one of the following ways:
•Using the cursor
Simply place the cursor in the desired position and press ![]() or <Enter> to finish the input.
or <Enter> to finish the input.
•By typing coordinates via keyboard
Type in the X coordinate, then either press <Tab> or click ![]() the Y coordinate's input box. Then type in the Y coordinate and press <Enter> or click
the Y coordinate's input box. Then type in the Y coordinate and press <Enter> or click ![]() at any position within the drawing window to finish the input.
at any position within the drawing window to finish the input.
•By typing Radius or Diameter and Arc angle via keyboard.
Activate the input box of the desired parameter by clicking it with ![]() or by sequentially pressing <Tab>, then type a value. Next, input the second parameter in the same way.
or by sequentially pressing <Tab>, then type a value. Next, input the second parameter in the same way.
The preview of two possible tangency variants between the selected line and circles forming the resulting arc will appear in the drawing window. Circles to be forming the resulting arc are shown in dashed lines. By default the arc passes along the circle nearest to the current cursor position. In order to switch the circle, move the cursor. Upon selecting the desired tangency variant, press ![]() or <Enter> to finish the input.
or <Enter> to finish the input.
When inputting values via keyboard, you can use hot keys and checkboxes disabling the dependency between the value and the cursor position.
•Using the combination of aforementioned methods
Type in a value of one of the parameters first, then define the ending point of the arc using the cursor. In such case the preview of the ending point will only follow the cursor within the limits set by the specified value.
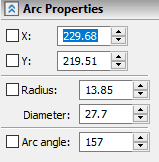
Upon defining the endpoint, the creation of the current arc will be finished.

If the continuous sketch creation is enabled, then the system will automatically start the creation of the next arc. In such case, the next arc is tangent to the previous arc by default, i.e. the selection of the source line is performed automatically, so order to finish the arc creation, you only have to define the endpoint. You can clear the selection of the previous arc by pressing ![]() and then select a different source line manually, if necessary.
and then select a different source line manually, if necessary.
Icon |
Ribbon |
|---|---|
|
Draw > Sketch > 3 points arc > Arc tangent to element Workplane > Sketch > 3 points arc > Arc tangent to element |
Keyboard |
Textual Menu |
<SK>><N> |
|
Automenu of the |
|
<N> |
Arc tangent to element |
Upon calling the command, you need to select a line, to which you want to ensure the tangency of the created arc, using ![]() . The selected line will be highlighted.
. The selected line will be highlighted.
If the selected line is an arc, the resulting arc will be tangent to the full circle or full ellipse forming the selected arc. Upon arc selection, such full circle or ellipse is indicated in dashed line. The tangency point may lay beyond the selected arc itself in this case.
If the selected line is a straight segment, the resulting arc will be tangent to the infinite line on which the selected segment lies. Upon segment selection, such infinite line is indicated in dashed line. The tangency point may lay beyond the selected segment itself in this case.
Upon selecting a source line, the preview of the circle forming the resulting arc appears. Such circle passes through the current position of the cursor and gets dynamically updated in accordance with cursor movements. The circle is defined by three points, which it passes through. Two points are sequentially defined by the user, the third point (point of tangency) is defined automatically. If the selected line is a circle or a circular arc, there are two possible tangency variants, that ensure passing of the resulting arc's circle through the cursor position. The initially displayed tangency variant is selected by the system arbitrarily. You can switch tangency variant by pressing <Z> or <Space>, if necessary.
Upon specifying one of the points, that define the resulting arc's circle, the switching of the tangency variant may become unavailable, if the combination of the specified point and the current position of the cursor allows only a single tangency variant.
Set the desired position of the first point, that defines the resulting arc's circle. It can be done in one of the following ways:
•Using the cursor
Simply place the cursor in the desired position and press ![]() or <Enter> to confirm the input.
or <Enter> to confirm the input.
•By typing coordinates via keyboard
Type in the X coordinate, then either press <Tab> or click ![]() the Y coordinate's input box. Then type in the Y coordinate and press <Enter> or click
the Y coordinate's input box. Then type in the Y coordinate and press <Enter> or click ![]() at any position within the drawing window to confirm the input. When typing values, you can use hot keys and checkboxes disabling the dependency between the value and the cursor position.
at any position within the drawing window to confirm the input. When typing values, you can use hot keys and checkboxes disabling the dependency between the value and the cursor position.
•Using the combination of aforementioned methods
Type in a value of one of the coordinates first, then define the second coordinate using the cursor.
Then, set the desired position of the second point, that defines the resulting arc's circle. Radius/diameter of the circle depends on this point. The position of the point may be specified in one of the following ways:
•Using the cursor
Simply place the cursor in the desired position and press ![]() or <Enter> to confirm the input.
or <Enter> to confirm the input.
•Using the keyboard
Type the desired value of Radius or Diameter. When typing value, you can use hot keys and checkbox disabling the dependency between the value and the cursor position.
If the specified value allows only a single tangency variant, then you only have to press <Enter> or click ![]() anywhere within the drawing window, in order to confirm the input.
anywhere within the drawing window, in order to confirm the input.
If the specified value doesn't allow to construct a circle tangent to the selected line, then the "Invalid value" warning is displayed in the parameters window and the input confirmation is not available. In such case, you have to input a different value.
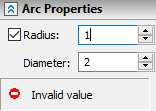
If the specified value allows more than one tangency variant, then the preview of all possible variants appears in the drawing window. The currently selected variant in shown in continuous line, others - in dashed lines. The variant closest to the current position of the cursor is selected by default. In order to switch the variant, move the cursor. Upon selecting the desired tangency variant, press ![]() or <Enter> to confirm the input.
or <Enter> to confirm the input.
Upon confirming the position of the second point, the circle forming the resulting arc is fully defined. Circle line becomes dashed. The resulting arc passes along such circle between the tangency point and the first of the points defined by the user, as described above. There are two possible arc configurations between these points. The currently selected configuration is the one nearest to the current cursor position; it is indicated in continuous line. In order to switch the configuration, move the cursor. Upon selecting the desired configuration, press ![]() or <Enter> to confirm the input. The creation of the current arc will be finished.
or <Enter> to confirm the input. The creation of the current arc will be finished.
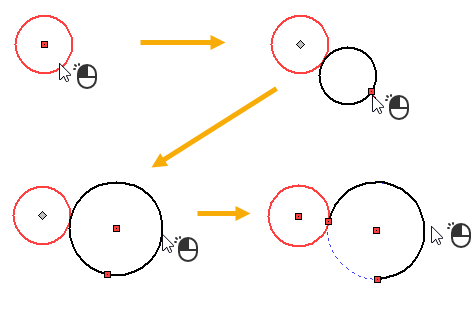
If the continuous sketch creation is enabled, then the system will automatically start the creation of the next arc. In such case, the next arc is tangent to the same source line by default and passes through the free end of the previous arc, i.e. the selection of the source line and the definition of the first point are performed automatically, so the arc creation starts from specifying the second point, that defines the resulting arc's circle. You can clear the selection of the source line and coordinates of the first point by sequentially pressing ![]() and then define them manually, if necessary.
and then define them manually, if necessary.
Icon |
Ribbon |
|---|---|
|
Draw > Sketch > 3 points arc > Arc Tangent to Two Elements Workplane > Sketch > 3 points arc > Arc Tangent to Two Elements |
Keyboard |
Textual Menu |
<SK>><M> |
|
Automenu of the |
|
<M> |
Arc Tangent to Two Elements |
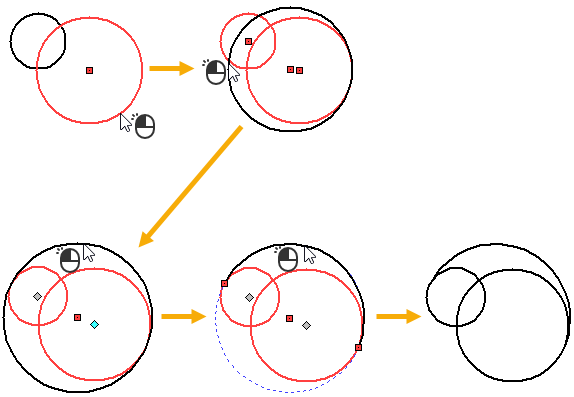
This command allows you to create an arc tangential to two graphic lines at once (straight line segments, circles, ellipses, arcs or splines).
Upon calling the command, you need to sequentially select two graphic lines, to which you want to ensure the tangency of the resulting arc, using ![]() . The selected lines will be highlighted.
. The selected lines will be highlighted.
If the selected line is an arc, the resulting arc will be tangent to the full circle or full ellipse forming the selected arc. Upon arc selection, such full circle or ellipse is indicated in dashed line. The tangency point may lay beyond the selected arc itself in this case.
If the selected line is a straight segment, the resulting arc will be tangent to the infinite line on which the selected segment lies. Upon segment selection, such infinite line is indicated in dashed line. The tangency point may lay beyond the selected segment itself in this case.
Upon selecting a first source line, the preview of the circle forming the resulting arc appears. Such circle passes through the current position of the cursor and gets dynamically updated in accordance with cursor movements. The circle is defined by three points, which it passes through. One point is defined by the user, two others (points of tangency) are defined automatically. If both of the selected lines are circles or circular arcs, for each of them there are two possible tangency variants, that ensure passing of the resulting arc's circle through the cursor position. The initially displayed tangency variant is selected by the system arbitrarily. You can switch between available tangency variants by pressing <Z> or <Space>, if necessary.
Upon selecting both source lines, set the desired position of the point, that defines the resulting arc's circle. Radius/diameter of the circle depends on this point. The position of the point may be specified in one of the following ways:
•Using the cursor
Simply place the cursor in the desired position and press ![]() or <Enter> to confirm the input.
or <Enter> to confirm the input.
•Using the keyboard
Type the desired value of Radius or Diameter. When typing value, you can use hot keys and checkbox disabling the dependency between the value and the cursor position.
If the specified value doesn't allow to construct a circle tangent to the selected lines, then the "Invalid value" warning is displayed in the parameters window and the input confirmation is not available. In such case, you have to input a different value.

If the specified value allows to construct a circle tangent to the selected lines, then there might be several tangency variants available. The preview of all variants appears in the drawing window. The currently selected variant in shown in continuous line, others - in dashed lines. The variant closest to the current position of the cursor is selected by default. In order to switch the variant, move the cursor. Upon selecting the desired tangency variant, press ![]() or <Enter> to confirm the input.
or <Enter> to confirm the input.
Upon confirming the position of the second point, the circle forming the resulting arc is fully defined. Circle line becomes dashed. The resulting arc passes along such circle between two tangency points. There are two possible arc configurations between these points. The currently selected configuration is the one nearest to the current cursor position; it is indicated in continuous line. In order to switch the configuration, move the cursor. Upon selecting the desired configuration, press ![]() or <Enter> to confirm the input. The creation of the arc will be finished.
or <Enter> to confirm the input. The creation of the arc will be finished.
