Sketch > Circle |
  
|
In the ribbon, as well as in the automenu of the Sketch command, options of arcs creation are grouped into a drop-down list. The presence of the drop-down list is indicated by the black triangle near an icon of an option displayed, when the list is folded. In order to unfold the list, either click ![]() a triangle
a triangle ![]() in the ribbon, or click and hold
in the ribbon, or click and hold ![]() on an icon of an option displayed, when the list is folded. This icon corresponds to an option used last in the current CAD session. When the Sketch command is launched, any option can be called via keyboard without unfolding the list.
on an icon of an option displayed, when the list is folded. This icon corresponds to an option used last in the current CAD session. When the Sketch command is launched, any option can be called via keyboard without unfolding the list.
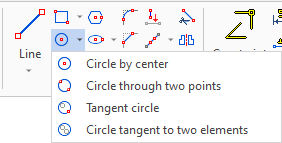
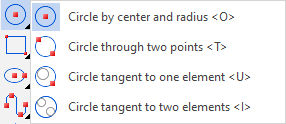
Circle by Center and Radius
Icon |
Ribbon |
|---|---|
|
Draw > Sketch > Circle by Center > Circle by Center Remarks > Remarks > Line > Circle by Center Workplane > Sketch > Circle by Center > Circle by Center |
Keyboard |
Textual Menu |
<SK>><O> |
|
Automenu of the |
|
<O> |
Circle by Center and Radius |
To create a circle, you should specify the position of its center and radius (diameter). You can do it using ![]() , or you can set the exact values of the coordinates of the center and radius (diameter) in the parameters window.
, or you can set the exact values of the coordinates of the center and radius (diameter) in the parameters window.
Icon |
Ribbon |
|---|---|
|
Draw > Sketch > Circle by Center > Circle through Two Points Workplane > Sketch > Circle by Center > Circle through Two Points |
Keyboard |
Textual Menu |
<SK>><T> |
|
Automenu of the |
|
<T> |
Circle through Two Points |
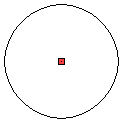
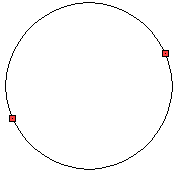
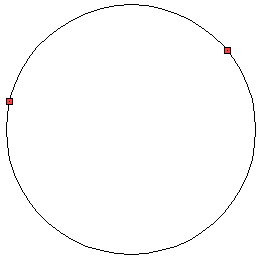
This option is intended to create a circle passing through two points. You can set two points through which the circle should pass, using ![]() or by specifying coordinates in the parameters window. Then you should specify the radius (diameter) of the circle. To do this, you can use
or by specifying coordinates in the parameters window. Then you should specify the radius (diameter) of the circle. To do this, you can use ![]() to select the third point to determine the position and radius of the circle or use the parameters window.
to select the third point to determine the position and radius of the circle or use the parameters window.
Icon |
Ribbon |
|---|---|
|
Draw > Sketch > Circle by Center > Tangent Circle Workplane > Sketch > Circle by Center > Tangent Circle |
Keyboard |
Textual Menu |
<SK>><U> |
|
Automenu of the |
|
<U> |
Circle Tangent to One Element |
Upon calling the command, you need to select a line, to which you want to ensure the tangency of the resulting circle, using ![]() . The selected line will be highlighted.
. The selected line will be highlighted.
If the selected line is an arc, the resulting circle will be tangent to the full circle or full ellipse forming the selected arc. Upon arc selection, such full circle or ellipse is indicated in dashed line. The tangency point may lay beyond the selected arc itself in this case.
If the selected line is a straight segment, the resulting circle will be tangent to the infinite line on which the selected segment lies. Upon segment selection, such infinite line is indicated in dashed line. The tangency point may lay beyond the selected segment itself in this case.
Upon selecting a source line, the preview of the resulting circle appears. It passes through the current position of the cursor and gets dynamically updated in accordance with cursor movements. The circle is defined by three points, which it passes through. Two points are sequentially defined by the user, the third point (point of tangency) is defined automatically. If the selected line is a circle or a circular arc, there are two possible tangency variants, that ensure passing of the resulting circle through the cursor position. By default, the system suggests the tangency variant, which results in less distance between the tangency point and the cursor. You can switch tangency variant by pressing <Z> or <Space>, if necessary.
Upon specifying one of the points, that define the resulting arc's circle, the switching of the tangency variant may become unavailable, if the combination of the specified point and the current position of the cursor allows only a single tangency variant.
Set the desired position of the first point, that defines the resulting circle. It can be done in one of the following ways:
•Using the cursor
Simply place the cursor in the desired position and press ![]() or <Enter> to confirm the input.
or <Enter> to confirm the input.
•By typing coordinates via keyboard
Type in the X coordinate, then either press <Tab> or click ![]() the Y coordinate's input box. Then type in the Y coordinate and press <Enter> or click
the Y coordinate's input box. Then type in the Y coordinate and press <Enter> or click ![]() at any position within the drawing window to confirm the input. When typing values, you can use hot keys and checkboxes disabling the dependency between the value and the cursor position.
at any position within the drawing window to confirm the input. When typing values, you can use hot keys and checkboxes disabling the dependency between the value and the cursor position.
•Using the combination of aforementioned methods
Type in a value of one of the coordinates first, then define the second coordinate using the cursor.
Then, set the desired position of the second point, that defines the resulting circle. Radius/diameter of the circle depends on this point. The position of the point may be specified in one of the following ways:
•Using the cursor
Simply place the cursor in the desired position and press ![]() or <Enter> to confirm the input.
or <Enter> to confirm the input.
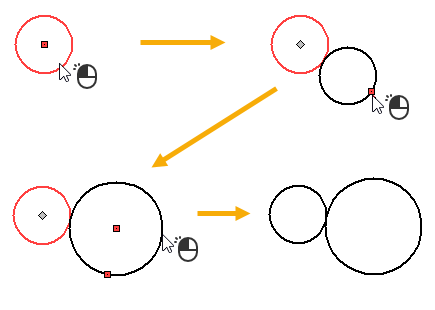
•Using the keyboard
Type the desired value of Radius or Diameter. When typing value, you can use hot keys and checkbox disabling the dependency between the value and the cursor position.
If the specified value allows only a single tangency variant, then you only have to press <Enter> or click ![]() anywhere within the drawing window, in order to confirm the input.
anywhere within the drawing window, in order to confirm the input.
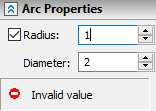
If the specified value doesn't allow to construct a circle tangent to the selected line, then the "Invalid value" warning is displayed in the parameters window and the input confirmation is not available. In such case, you have to input a different value.
If the specified value allows more than one tangency variant, then the preview of all possible variants appears in the drawing window. The currently selected variant in shown in continuous line, others - in dashed lines. The variant closest to the current position of the cursor is selected by default. In order to switch the variant, move the cursor. Upon selecting the desired tangency variant, press ![]() or <Enter> to confirm the input.
or <Enter> to confirm the input.
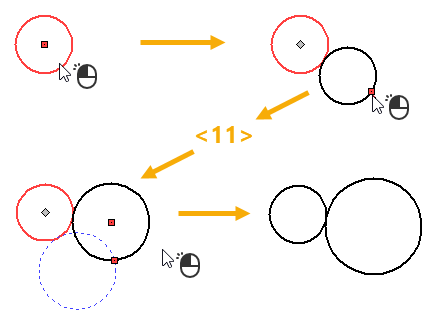
Upon confirming the position of the second point, the circle creation will be finished.
Circle Tangent to Two Elements
Icon |
Ribbon |
|---|---|
|
Draw > Sketch > Circle by Center > Circle Tangent to Two Elements Workplane > Sketch > Circle by Center > Circle Tangent to Two Elements |
Keyboard |
Textual Menu |
<SK>><I> |
|
Automenu of the |
|
<I> |
Circle Tangent to Two Elements |

Upon calling the command, you need to sequentially select two lines, to which you want to ensure the tangency of the resulting circle, using ![]() . The selected lines will be highlighted.
. The selected lines will be highlighted.
If the selected line is an arc, the resulting circle will be tangent to the full circle or full ellipse forming the selected arc. Upon arc selection, such full circle or ellipse is indicated in dashed line. The tangency point may lay beyond the selected arc itself in this case.
If the selected line is a straight segment, the resulting circle will be tangent to the infinite line on which the selected segment lies. Upon segment selection, such infinite line is indicated in dashed line. The tangency point may lay beyond the selected segment itself in this case.
Upon selecting a first source line, the preview of the resulting circle appears. It passes through the current position of the cursor and gets dynamically updated in accordance with cursor movements. The circle is defined by three points, which it passes through. One point is defined by the user, two others (points of tangency) are defined automatically. If both selected lines are circles or circular arcs, for each of them there are two possible tangency variants, that ensure passing of the resulting circle through the cursor position. By default, the system suggests the tangency variant, which results in less distance between both tangency points and the cursor. You can sequentially switch between available tangency variants by pressing <Z> or <Space>, if necessary.
Upon selecting both source lines, set the desired position of the point, that defines the resulting circle. Radius/diameter of the circle depends on this point. The position of the point may be specified in one of the following ways:
•Using the cursor
Simply place the cursor in the desired position and press ![]() or <Enter> to confirm the input.
or <Enter> to confirm the input.
•Using the keyboard
Type the desired value of Radius or Diameter. When typing value, you can use hot keys and checkbox disabling the dependency between the value and the cursor position.
If the specified value doesn't allow to construct a circle tangent to selected lines, then the "Invalid value" warning is displayed in the parameters window and the input confirmation is not available. In such case, you have to input a different value.

If the specified value allows to construct a circle tangent to the selected lines, then there might be several tangency variants available. The preview of all variants appears in the drawing window. The currently selected variant in shown in continuous line, others - in dashed lines. The variant closest to the current position of the cursor is selected by default. In order to switch the variant, move the cursor. Upon selecting the desired tangency variant, press ![]() or <Enter> to confirm the input.
or <Enter> to confirm the input.
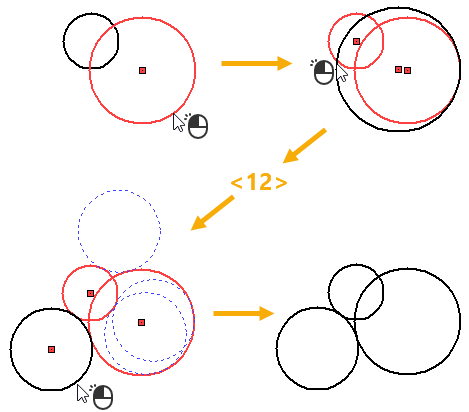
Upon confirming the position of the point, the circle creation will be finished.