Sketch > Rectangle |
  
|
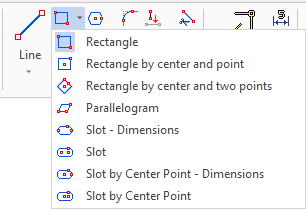
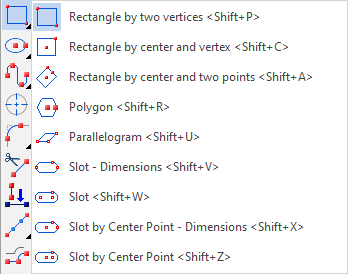
In the ribbon, as well as in the automenu of the Sketch command, options of rectangles creation are grouped into a drop-down list. The presence of the drop-down list is indicated by the black triangle near an icon of an option displayed, when the list is folded. The same list contains the polygon, parallelogram and slots creation options. In order to unfold the list, either click ![]() a triangle
a triangle ![]() in the ribbon, or click and hold
in the ribbon, or click and hold ![]() on an icon of an option displayed, when the list is folded. This icon corresponds to an option used last in the current CAD session. When the Sketch command is launched, any option can be called via keyboard without unfolding the list.
on an icon of an option displayed, when the list is folded. This icon corresponds to an option used last in the current CAD session. When the Sketch command is launched, any option can be called via keyboard without unfolding the list.
Rectangle by two points
Icon |
Ribbon |
|---|---|
|
Draw > Sketch > Rectangle > Rectangle Remarks > Remarks > Line > Rectangle Workplane > Sketch > Rectangle > Rectangle |
Keyboard |
Textual Menu |
<SK>> |
|
Automenu of the |
|
<Shift>+<P> |
Rectangle by two vertices |
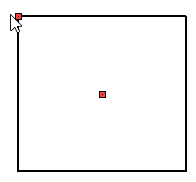
To construct a rectangle, it is enough to set the location of its two opposite corners. Points can be set using ![]() , or by entering the coordinates in the parameters window.
, or by entering the coordinates in the parameters window.
There is the Create Group checkbox at the bottom of the parameters window. When it's enabled, lines forming each created rectangle will be united into a separate group.
Icon |
Ribbon |
|---|---|
|
Draw > Sketch > Rectangle > Rectangle by center and point Remarks > Remarks > Line > Rectangle by center and point Workplane > Sketch > Rectangle > Rectangle by center and point |
Keyboard |
Textual Menu |
<SK>> |
|
Automenu of the |
|
<Shift>+<С> |
Rectangle by center and vertex |
The creation of the rectangle begins with selection of the center point. The position of the point can be set directly in the drawing window, using ![]() , or entering coordinates in the parameters window. Then you need to specify the position of the remaining vertices of the rectangle. This can be done by simply specifying the position of one of the vertices of the rectangle in the drawing with
, or entering coordinates in the parameters window. Then you need to specify the position of the remaining vertices of the rectangle. This can be done by simply specifying the position of one of the vertices of the rectangle in the drawing with ![]() . You can also specify the exact values of the height and width of the rectangle in the parameters window. In this case, you should click
. You can also specify the exact values of the height and width of the rectangle in the parameters window. In this case, you should click ![]() in the drawing window or press <Enter> after setting the parameters to complete the creation of the element. You can also combine these two ways: for example, enter only the height in the parameters window, and define the width by specifying a point in the drawing. Before specifying the coordinates of the second point (vertex) and applying creation, the parameters of the rectangle can be changed.
in the drawing window or press <Enter> after setting the parameters to complete the creation of the element. You can also combine these two ways: for example, enter only the height in the parameters window, and define the width by specifying a point in the drawing. Before specifying the coordinates of the second point (vertex) and applying creation, the parameters of the rectangle can be changed.
There is the Create Group checkbox at the bottom of the parameters window. When it's enabled, lines forming each created rectangle will be united into a separate group.
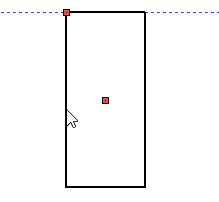
Construct Rectangle by Center and Two Points
Icon |
Ribbon |
|---|---|
|
Draw > Sketch > Rectangle > Rectangle by center and two points Remarks > Remarks > Line > Rectangle by center and two points Workplane > Sketch > Rectangle > Rectangle by center and two points |
Keyboard |
Textual Menu |
<SK>> |
|
Automenu of the |
|
<Shift>+<A> |
Rectangle by center and two points |
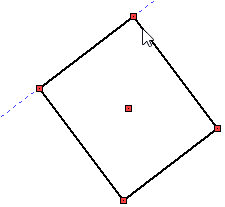
If you want to create a rectangle at a certain angle, then it is convenient to use the Rectangle by center and two points option.
The creation of a rectangle begins with specifying a point, which will be its center. You can specify a point in the parameters window by specifying its coordinates, or by using ![]() . Further, a dynamic image of a segment appears, the center of which lies at the selected point. This segment sets the width of the rectangle and the angle of its side. Using
. Further, a dynamic image of a segment appears, the center of which lies at the selected point. This segment sets the width of the rectangle and the angle of its side. Using ![]() , you can set both the angle and the width value at the same time, or use the parameters window to set the exact values of these parameters. If you set the width value, then an image of a circle will appear, whose diameter is equal to the specified width of the rectangle. Diametrically located points defining the position of the side of the rectangle will move along the circle. Angle can be specified using
, you can set both the angle and the width value at the same time, or use the parameters window to set the exact values of these parameters. If you set the width value, then an image of a circle will appear, whose diameter is equal to the specified width of the rectangle. Diametrically located points defining the position of the side of the rectangle will move along the circle. Angle can be specified using ![]() , or set the angle in the parameters window. If you specify values using the menu, you need apply changes by clicking
, or set the angle in the parameters window. If you specify values using the menu, you need apply changes by clicking ![]() in the drawing window, or by pressing <Enter>.
in the drawing window, or by pressing <Enter>.
There is the Create Group checkbox at the bottom of the parameters window. When it's enabled, lines forming each created rectangle will be united into a separate group.
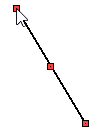
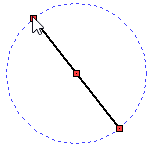
The final step in creating a rectangle is to set its height. Height can be set via the parameters window or in the drawing field by pressing ![]() . As in the previous cases, if you set the height value using the window you need to apply creation.
. As in the previous cases, if you set the height value using the window you need to apply creation.
