Creating Macros, Macro Editor |
  
|
Macro Editor window
A special Macro Editor is intended for creating macros. It is an integrated macro development environment in T-FLEX that contains a complete set of editing and debugging tools. You don't need any other applications or programming systems to write a macro. All tools are located inside the Macro Editor.
You can open the macro editor using the command:
Icon |
Ribbon |
|---|---|
|
Tools > Tools > Macro Editor |
Keyboard |
Textual Menu |
<WM> |
Tools > Macro Editor |
The macro editor works in parallel with the main T-FLEX CAD window. That is, when the macro editor window is open, you can perform various actions in the window of the T-FLEX CAD application itself (open/close documents, for example).
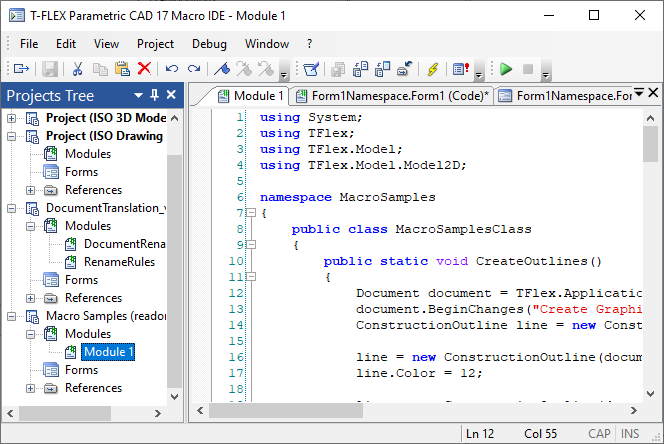
The figure below shows the basic tools of the Macro Editor.
|
1. Properties window 2. Projects window 3. Standard toolbar 4. Textual menu 5. Project toolbar 6. Window tabs for open modules and forms 7. Debug toolbar 8. Tools window 9. Macro editor working window 10. Output window 11. Breakpoints window |
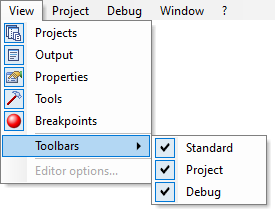
You can control the display of service windows and toolbars of the macro editor using the View textual menu.
The location of all service windows of the macro editor can be configured in the same way as it is done with the service windows of the main T-FLEX CAD window. They can be “fixed” to the edges of the working window, made “pop-up” or put into “floating” mode. In order to save screen space, part of the windows can be combined in one group window. Unused service windows can be disabled.
The Projects window displays the Projects available for editing. These are files opened in the T-FLEX CAD window, as well as documents from the “…/Program/Macros” directory. Using this window, you can view the structure of Projects, as well as perform various actions on their elements (create modules/forms, open them for editing, etc.).
The Projects window of the macro editor and the Macros service window work synchronously. If you close the Project file (document) in T-FLEX CAD, it will also be closed in the Projects window of the macro editor. Similarly, after creating and debugging a macro in the Macro Editor, it will appear in the Macros window of T-FLEX CAD.
Creation/editing of module codes and the contents of the Project forms is carried out in the working window of the macro editor. This is the main window of the macro editor. The code of each module or form of the Project opens in a separate window. To switch between the windows of modules and forms, use the tabs of these windows, located in the upper part of the working window of the macro editor. Code windows can be grouped vertically or horizontally.
The Properties and Tools windows are necessary for creating/editing graphic forms of Projects. The Breakpoints and Output windows are used during compilation and debugging of the created module.
Project management. Project structure
The Projects window is used to manage Projects in the macro editor. When you open the macro editor, this window displays all currently available Projects. These are all documents open in the current T-FLEX CAD application, as well as Projects stored in a special folder “… T-FLEX Parametric CAD/Program/Macros/”. Work with several Projects can go in parallel.
Each Project is displayed as a hierarchical structure that includes a set of modules, forms and links.
When writing macros in the T-FLEX CAD environment, modular programming is used. Modular programming is the organization of a program as a collection of small independent blocks called modules, the structure and behavior of which obeys certain rules.
Module is a program unit that includes various components (types, constants, variables, namespaces, classes, procedures and functions). From the point of view of the program code, a macro is a procedure - a part of a program designed to perform a separate specific task.
Form is a macro dialog box on which controls (text, buttons, editors, radio buttons, etc.) can be placed to use when running a macro. Working with this window will be discussed in more detail later in the Creating Macros with Screen Forms section.
References are needed in order to access the properties, methods and events of a specific object and use this object when programming a macro. For example, to use T-FLEX CAD commands in the Project, you must have a reference to TFlexAPI.dll. When creating a new project, basic links have already been added to it for using system objects, as well as T-FLEX CAD data and objects.
A project can include any number of modules, forms, and references. In turn, each module of the Project can contain any number of macros.
To avoid the problem of duplicate macro names in complex projects, namespaces can be used.
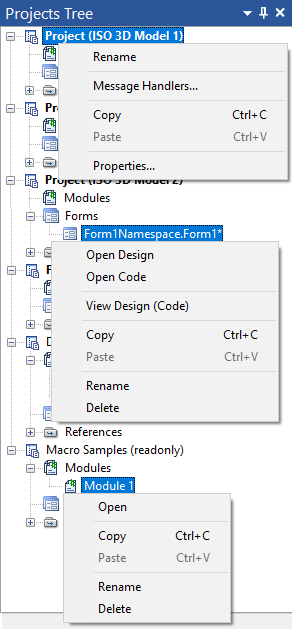
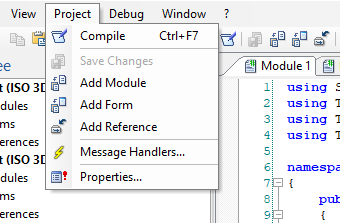
A context menu with a set of special commands is available for any object of the Projects tree (Project, module folder or separate module, form, referance). These commands allow you to rename the selected Project, add a new module or form to it, etc. Some of these commands can also be called from the Project textual menu and from the toolbar of the same name.
Project creation. Project Properties
To create a new Project, open a new document in T-FLEX CAD. A new Project will automatically appear in the Projects window in the macro editor. The structure of this Project will only contain links.
The default programming language for any new Project is C#. If you need to use another programming language, you must specify this immediately after creating a new Project. Changing the programming language of the Project after the creation of modules and forms leads to the irrelevance of the code of already existing modules and forms. In such a situation, it will be necessary to delete all modules and forms of the Project, and then create them anew.
The programming language of the Project (macro) is specified in the Project properties dialog:
Macro Editor |
||
|---|---|---|
Icon |
Keyboard |
Textual Menu |
|
<WM> |
Project > Properties... |
The Project properties dialog can also be called from the context menu of the Project in the Projects window.
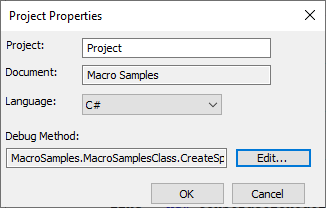
After calling this command, a dialog with the properties of the current Project will be displayed. The name of the Project is shown in the Project field of this dialog. The Document field displays the name of the T-FLEX CAD file that contains this Project.
In the Language drop-down list, you can select the programming language of this Project. At the moment the choice of the following programming languages is possible: Visual Basic, C#.
The additional parameter Debug Method is used only in macro debugging mode. If the debug mode is not used, then the method can be omitted.
To set the debugged method, click the Edit button. As a result, a dialog with a list of methods of the current project will be called. Working with this dialog is described in the Debugging, Compiling and Running Macros section.
Creation of modules. Module code window
After choosing the programming language of the Project, you can create the necessary modules and forms.
It is easy to create a new module in the Project. It is enough to place the cursor on the Modules heading in the Project tree (Projects window), press ![]() and call the Add command from the appeared context menu. You can also call the command from the text menu or from the Macro Editor Project toolbar:
and call the Add command from the appeared context menu. You can also call the command from the text menu or from the Macro Editor Project toolbar:
Macro Editor |
||
|---|---|---|
Icon |
Keyboard |
Textual Menu |
|
|
Project > Add Module |
As a result, a new window with the module code will open in the working window of the macro editor. In this window, a part of the code will already be automatically created, references, namespace, class and procedure are declared.
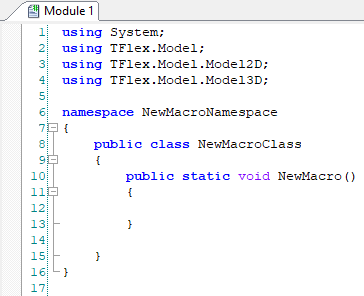
To create a simple macro, it is enough to write one procedure and compile the Project.
Note that by default a new Project contains only the standard links to the four libraries. If a macro will use a library that is not referenced in the standard list, the user needs to add it to the list of references himself. To do this, you can use the command:
Macro Editor |
||
|---|---|---|
Icon |
Keyboard |
Textual Menu |
|
|
Project > Add Reference |
This command can also be called from the context menu of the Projects window. To do this, select the References section in the current Project tree and press ![]() . In the context menu that appears, the Add command will be available.
. In the context menu that appears, the Add command will be available.
Managing code windows of modules
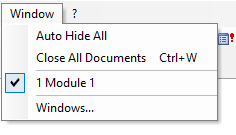
The code of each module of the Project opens in a separate window. To switch between module windows, use the tabs located in the upper part of the working window. Code windows can be grouped vertically or horizontally.
The commands of the Window textual menu are used to control the windows of the modules.
Code editor settings
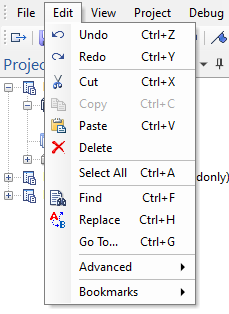
The module code window is a text editor with standard text editing capabilities (Copy, Paste, etc.). Commands for working with text are available in the context menu, on the Standard toolbar and in the Edit textual menu. In addition, in the settings dialog of the working window, you can set specific settings for the code editor: automatic line numbering, automatic indentation, color highlighting of various syntactic code units, etc.
Module code editor settings are set using the command:
View > Editor options...
When you call the command, the code editor settings window opens.
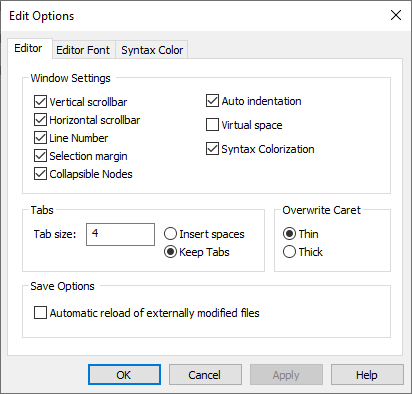
The following parameters are set on the Editor tab:
Window settings group of parameters:
Vertical scrollbar and Horizontal scrollbar. These parameters control the display of scroll bars in code windows;
Line Number. The parameter responsible for displaying the line numbers of the code;
Label Number. This parameter controls the display of the assigned tab labels and breakpoints on the left side of the code windows;
Collapsible Nodes. Show/hide nodes that allow you to collapse parts of the code.
Auto identation. If this check box is selected, each new line of code that is created is automatically assigned the same indentation as the previous line;
Virtual space. When this option is enabled, the cursor can be placed anywhere in the code window. When disabled, the cursor is positioned only within the existing text;
Syntax Colorization. The parameter allows highlighting different syntax structures of the code in different colors. The color scheme of the selection is set on the Syntax Color tab of this dialog;
The Tabs > Tab size parameter sets the length of the tab characters used to create automatic indentation of lines of code. The unit for specifying the length is the width of the space character;
The Overwrite Caret parameter group determines the type of the cursor in the text replacement mode.
The last parameter of this tab - Automatic reload of externally modified files - is used in situations when a Project document is opened simultaneously in several T-FLEX CAD applications. If the checkbox is selected, the Project will be automatically synchronized in all applications.
On the other two tabs of the settings dialog - the Editor Font tab and the Syntax Color tab - you can set the parameters of the font used to display the code, and the parameters of the color highlighting of various syntax structures of the code.
Using bookmarks
For the convenience of working with large code in the code editor window, you can assign bookmarks (labels) to individual lines of code. Bookmarks allow you to quickly move in the code window from one marked line of code to the next.
To add a bookmark, place the cursor on the required line of code and call the Toggle Bookmark command:
Macro Editor |
||
|---|---|---|
Icon |
Keyboard |
Textual Menu |
|
<Ctrl>+<F2> |
Edit > Bookmarks > Toggle Bookmark |
After calling the command, a bookmark label will appear in the code window to the left of the selected line (if the label area in the code window is enabled).
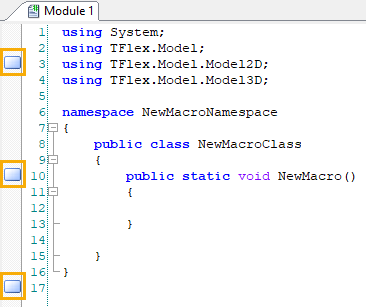
After “placing” the bookmarks, it will be possible to quickly move through the text of the module using the commands:
Macro Editor |
||
|---|---|---|
Icon |
Keyboard |
Textual Menu |
|
<F2> |
Edit > Bookmarks > Next Bookmark |
Macro Editor |
||
|---|---|---|
Icon |
Keyboard |
Textual Menu |
|
<Shift>+<F2> |
Edit > Bookmarks > Prev Bookmark |
The label of the active bookmark (that is, the bookmark on which the cursor is currently located) is highlighted in color.
Deleting a bookmark is performed by calling the Toggle Bookmark command again for the marked line of code.
Macros example 1
As an example, let's create a macro that will automatically build a construction line - a circle and line text, fixed to a node and this circle.
To do this, create a new 2D document in T-FLEX CAD. In the macro editor, select its Project in the project tree (Project window) and create a new module in it. In the module code window, paste the following text.
// Declaring references
using System;
using TFlex;
using TFlex.Model;
using TFlex.Model.Model2D;
// Declaring class
public class NewMacroClass
{
// Declaring procedure (macro name)
public static void CreateText()
{
//Creating document object – the currently active document
Document document = TFlex.Application.ActiveDocument;
// Opening block of document changes
document.BeginChanges("Creating text");
// Creating text object– string text
LineText text = new LineText(document);
// Creating free nodes in the document, with the coordinates (150,100) and (150,140)
FreeNode node1 = new FreeNode(document,150,100);
FreeNode node2 = new FreeNode(document,150,140);
// Creating circle by the center and a point to pass through
CircleConstruction circle = new CircleConstruction(document);
circle.SetCenterAndNode(node1,node2);
// Defining object text parameters
text = new LineText(document);
FontStyle style = text.FontStyle;
style.FontName = "Arial";
style.Bold = true;
style.Italic = true;
text.Color = 1;
text.Node = node2;
text.Circle = circle;
text.TextValue = "Text on circle";
text.HorizontalAlignment = TextHorizontalAlignment.Center;
// Closing block of document changes
document.EndChanges();
}
}
After writing the macro code, you need to compile its Project.