Changing Trajectory of Section in Hatch Contour |
  
|
Upon selecting a segment in the hatch contour editing mode, you can change segment's shape in one of the following ways:
•replace a curve, which defines shape of the segment;
•switch a trajectory along the current curve;
•snap a trajectory along the current curve to a 2D node.
If the current segment of the hatch contour passes along a curve, you can replaced it by a straight segment passing through the same starting and ending nodes. To do so, activate the following automenu option:
|
<L> |
Straighten Contour Segment |
If the current segment is already straight, this option is not available.

1 - Selecting a segment of contour to be edited
2 - Activating the segment straightening option
3 - Result of editing
Replacing a curve, which defines shape of the segment
If there is a construction curve passing through the starting and the ending node of the current segment, you can direct the segment along such curve using one of the following automenu options:
|
<С> |
Select Circle |
|
<E> |
Select Ellipse |
|
<S> |
Select Spline |
Upon activating the option via keyboard, the current segment gets instantly defined by a nearest (to the cursor) curve of the corresponding type passing through its starting and ending nodes. Upon activating the option via mouse, you have to additionally press ![]() within drawing window for selecting a curve. If there are no suitable curves, the option will have no effect. Unlike defining a new contour, during editing you cannot use graphic lines for directing the segment.
within drawing window for selecting a curve. If there are no suitable curves, the option will have no effect. Unlike defining a new contour, during editing you cannot use graphic lines for directing the segment.

1 - Selecting a segment of contour to be edited
2 - Activating the circle selection option
3 - Result of editing
Switching a trajectory along the current curve
If the current segment of the hatch contour is defined via a closed construction curve, you can change the trajectory of the segment along such curve to an opposite one using the following automenu option:
|
<Z> |
Change arc direction |
This option is not available for straight segments.

1 - Selecting a segment of contour to be edited
2 - Activating the arc direction change option
3 - Result of editing
Snapping a trajectory along the current curve to a 2D node
If the current segment of the hatch contour is defined via a construction circle, you can snap the trajectory of the segment along such circle to a 2D node using the following automenu option
|
<A> |
Link Arc or Circle to Node |
Upon activating this option, pressing ![]() within drawing window selects the nearest 2D node. The current segment of the contour will always pass along the section of the circle, which is closer to the selected node.
within drawing window selects the nearest 2D node. The current segment of the contour will always pass along the section of the circle, which is closer to the selected node.
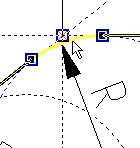
If a trajectory of a segment along a circle is already snapped to a node, such node is highlighted upon selecting the segment.
Snapping can be canceled using the following automenu option:
|
<B> |
Break Link with 2D Node |
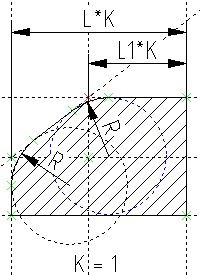
Let's take a look at the example, where positions of construction lines change, upon changing the value of the K variable. Both circles here are linked to a node on the drawing in order to ensure correct position. The figure below shows the hatch contour in the original configuration (K=1).

Let's snap the trajectory of the hatch contour along the blue circle to the marked node. To do this, following steps are preformed upon calling the Edit Hatch command:
•call the hatch contour editing option;
•select the arc;
•call the option ![]() (<A>);
(<A>);
•select the node.

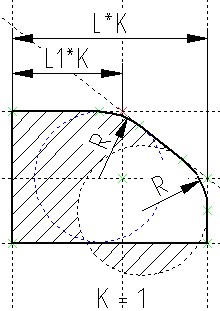
The next figure shows the modified drawing, where the К is equal to (-1). The contour segment on top of the blue circle was linked to the marked node and adjusted correctly. The contour segment on top of the second circle was not linked to the node, which resulted in an incorrect configuration.
