Create Detail View by Elements |
  
|
Detail views by elements can be created using the following automenu option of the Drawing View command:
|
<V> |
New Detailed View |
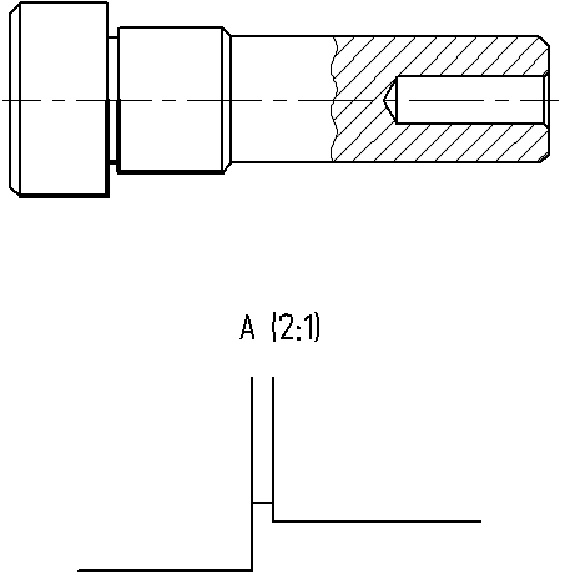
As a result of its use, the drawing view containing automatically created copy of the selected elements of the drawing will be created. In addition, the image on the drawing view page will be automatically augmented with the view caption.

When using this option, the following will be created:
1.A new drawing view (based on a new “Auxiliary”-type page). The drawing view parameters are set “by default”;
2.A translated copy (as in the command “Drawing > Copy > With translation”) for associative copying of the selected elements onto the drawing view page with specified parameters (scale and rotation angle);
3.The caption for the detail view.
As a result, a rectangular area of the drawing view is created on the main page with copies of selected elements displayed within. The size of the drawing view, as well as the size of its respective page, is defined automatically by the system based on the size of the copied entities. If necessary, the size of the drawing view and its page can be modified manually.
For creating the detail view, it is necessary to do the following:
1.Select the elements to be copied from the original drawing;
2.Select the fixing node for the copied elements;
3.Define location of the detail view (that is, the location of the drawing view containing the detail view).
After invoking the option ![]() the options for selecting the copied elements will appear in the auto menu:
the options for selecting the copied elements will appear in the auto menu:
|
<M> |
Select Mode |
|
<M> |
Deselect Mode |
|
<I> |
Select Other Element |
When the option is turned on ![]() all elements selected on the drawing are added to the list of the copied elements. For quick selection of several elements, you can use the selection with the window. When the option is turned off
all elements selected on the drawing are added to the list of the copied elements. For quick selection of several elements, you can use the selection with the window. When the option is turned off ![]() the selected on the drawing elements will be removed from the list of the copied elements. For quick selection, you can use the selection with the window here as well.
the selected on the drawing elements will be removed from the list of the copied elements. For quick selection, you can use the selection with the window here as well.
Complete the selection of the elements, which will be copied onto the detail view, by pressing ![]() .
.
After selecting the copied elements, the system will prompt the user to specify the fixing point of these elements (it will serve as the initial point of the copy to be created). The option for selecting a 2D node will appear in the auto menu:
|
<N> |
Set relation with Node |
After choosing the fixing node, the dynamic image of the created detail view attached to the cursor will appear on the screen. The location of the detail view on the drawing has to be selected next, as described in the Position and Orientation of Drawing View section.
To make the caption of the detail view change its location according to the modifications of the drawing, it is recommended to fix the drawing view to the 2D node.
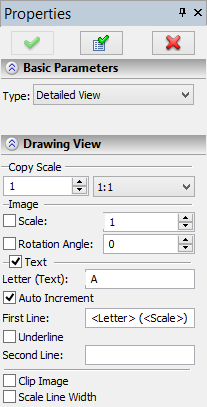
Before completing the detail view creation, the dialog for specifying parameters of the created view will remain available in the command's parameters window. In this dialog you can specify the precise values for the fixing point of the view, and also the following parameters:
Copy Scale. This scale determines the scale with which the selected elements of the drawing will be copied.
The group of parameters “Image” defines parameters of the drawing view being created (these parameters can be also specified directly in the drawing's window with the help of the markers on the view image):
Scale. The drawing scale of the drawing view, that is the scale with which the drawing view page is shown in the view area;
Rotation Angle. Angle of rotation of the drawing view.
Group of parameters “Text” allows specifying parameters of the view caption:
Letter (Text):. In this field the lettered caption for the created view is shown (selected by the system automatically). If necessary, you can choose another caption.
Auto Increment. When this flag is set, for each new detail view the “available” letter is automatically selected. It is shown in the field of the parameter “Letter (Text)”. When this flag is turned off, the automatic selection of the lettered caption does not occur.
First Line. The text in the first line of the view caption. This parameter supports the special format. To insert the lettered view caption (the value of the parameter “Letter (Text)”) into the line, the group of symbols “<Letter>” is used. To insert the copy scale caption (“1:1”, “1:2” ...) – the group of symbols “<Scale>”. By default, the string “<Letter> (<Scale>)” is set for this parameter.
Underline. When this flag is set, the text in the first line of the view caption will be underlined.
Second Line. This parameter defines the text of the second line of the view caption.
Clip Image. When this parameter is set, the view image will be cropped by the drawing view borders.
Scale Line Width. If this parameter is set, the width of the graphic lines of the detail view will be scaled according to the specified drawing scale of the view.

To complete view creation, use the option ![]() . For the view constructed, the caption will be automatically created. The obtained view can be edited and augmented, if required.
. For the view constructed, the caption will be automatically created. The obtained view can be edited and augmented, if required.