Managing View when Drawing on Active WP |
  
|
When drawing on an active WP, you can rotate 3D scene and use the active WP as clipping plane.
By default, upon entering the mode of drawing on active WP, the view direction becomes normal to such WP. Upon exiting the mode, the view direction returns to the initial state.
If you prefer keeping the view direction, upon entering the mode, then you should disable the Turn workplane on activation checkbox in system options (Options > 3D > Scene Rotation).
Upon entering the mode of drawing on active WP, the usual methods of rotating 3D scene become locked. However, in order to select some 3D elements for projecting them onto the WP, you may need to rotate the scene. Rotation lock can be disabled using the following command:
Icon |
Ribbon |
|---|---|
|
|
Keyboard |
Textual Menu |
|
View > Workplane > Rotate Scene |
The command is also available in the View toolbar. Upon calling it, its icon gets highlighted and the usual 3D scene rotation methods get unlocked. It order to re-lock the rotation, call the command again. Also, the rotation is locked automatically, upon calling any of the 2D elements creation commands.
Moreover, you can temporarily unlock the rotation by holding the <Alt> button. Releasing the button, re-locks the rotation.
Besides, within the mode of drawing on active WP, same as outside of this mode, you may use standard view points and the ![]() Rotate Normal to Selected Element command.
Rotate Normal to Selected Element command.
If you need to make the view direction normal to the active WP again, use the following command:
Icon |
Ribbon |
|---|---|
|
Workplane > Modes > Rotate Orthogonal |
Keyboard |
Textual Menu |
|
View > Workplane > Rotate Orthogonal |
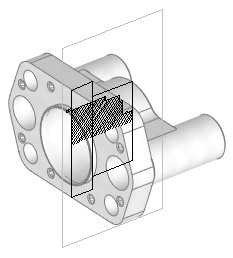
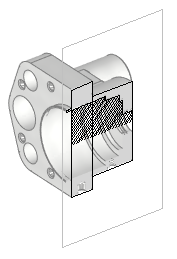
Clipping 3D scene by active WP
Command call:
Icon |
Ribbon |
|---|---|
|
Workplane > Modes > Activate Clipping Plane |
Keyboard |
Textual Menu |
|
View > Workplane > Activate Clipping Plane |
The command activates the custom clipping plane and coincides it with the active WP.

