"Solid Fill" Filling Method. General Parameters of Hatch |
  
|

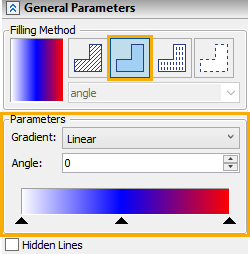
The ![]() Solid Fill filling method fills hatch contours with a selected color or with a gradient of multiple colors.
Solid Fill filling method fills hatch contours with a selected color or with a gradient of multiple colors.
The Gradient drop-down list located at the top of this method's group of parameters contains following options:
•No
Single color filling without gradient. The color can be set in the Style group of the Ribbon or in the Filling tab of the hatch parameters dialog. Black color is used by default.
•Linear
Multi-color filling with linear gradient. Colors and angle of gradient can be set below.
•Circular
Multi-color filling with linear gradient. Colors can be set below. The center of the gradient's circles is common for all contours. By default, it is placed at the combined center of all contours. The hatch editing command allows you to select starting node of hatch. If a starting node of hatch is selected, then this node is used as the center gradient circles.

Linear gradient |
Linear gradient |
Circular gradient |
Below there is the input box, where you can set the Angle of the linear gradient. The box is inactive for other gradient options.
The color scale in the bottom of the filling method's parameters group allows you defining colors to be used in gradient.
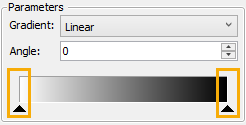
A position a color on the scale is indicated with a triangular marker ![]() . Position on the scale defines the position within the gradient in filled contours. For linear gradient, the left edge of the scale corresponds to the leftmost point of the leftmost contour, the right edge of the scale - to the rightmost point of the rightmost contour. For circular gradient, left edge of the scale corresponds the combined center of contours, the right edge - to the point most distant from such center.
. Position on the scale defines the position within the gradient in filled contours. For linear gradient, the left edge of the scale corresponds to the leftmost point of the leftmost contour, the right edge of the scale - to the rightmost point of the rightmost contour. For circular gradient, left edge of the scale corresponds the combined center of contours, the right edge - to the point most distant from such center.
Two colors - white and black are used by default. Thus, filling smoothly transits from white to black through shades of gray.

You can add any number of any colors to the scale. To add a new color, double-click ![]()
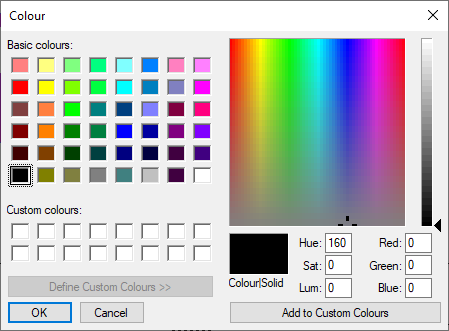
![]() the desired position on the scale. A standard Windows color selection dialog will appear.
the desired position on the scale. A standard Windows color selection dialog will appear.

After selecting a color and closing this window, the selected color will appear on the scale at the specified position. Using the ![]() marker, you can set the new position of the color on the scale. To do this, move the cursor over the desired marker. The cursor appearance will change to
marker, you can set the new position of the color on the scale. To do this, move the cursor over the desired marker. The cursor appearance will change to ![]() . Then press and hold
. Then press and hold ![]() , while moving the mouse. The marker will start following the cursor. Set the desired position of the marker and release
, while moving the mouse. The marker will start following the cursor. Set the desired position of the marker and release ![]() .
.
To delete a color from the transition scale, drag its marker out of the scale.
To modify one of the colors, double-click ![]()
![]() the respective color marker.
the respective color marker.
Color scale may also be handled using the contextual menu, which can be invoked by pressing ![]() within the scale. The content of the menu depends on where its called from. Compared to calling the menu from transitional portions of the scale, when calling the menu from the color markers positions, it will additionally contain color selection and deletion commands. Save and Load commands allows to save the scale into a *.col-file or load it from such file.
within the scale. The content of the menu depends on where its called from. Compared to calling the menu from transitional portions of the scale, when calling the menu from the color markers positions, it will additionally contain color selection and deletion commands. Save and Load commands allows to save the scale into a *.col-file or load it from such file.
|
|